Wednesday, May 22, 2013

(Semi) CTR 7: DMT Diamond Stones -- Three 6 inch stones

I've hesitated over writing this review here.  So it gets to be a Semi-Cheap Tool Review, and part of the series.  A $75 set of sharpening "stones" is not exactly cheap, though it's less expensive than some sets out there.  On the other hand, every woodworker will need to sharpen tools sooner or later, and it's hard to get inexpensive stones these days.  Even sandpaper is kind of pricey if you do enough sharpening.

I got these in December.  Unfortunately, I'd more or less finished packing up my shop to move, and it's taken this long to get them back out and give them a fair test.

So here are my thoughts.

Where, and how much?

These are available a lot of places.  At the moment, you can get them from Amazon (here) for about $75.  They may be more or less expensive other places.

What do you get, and what's the construction like?

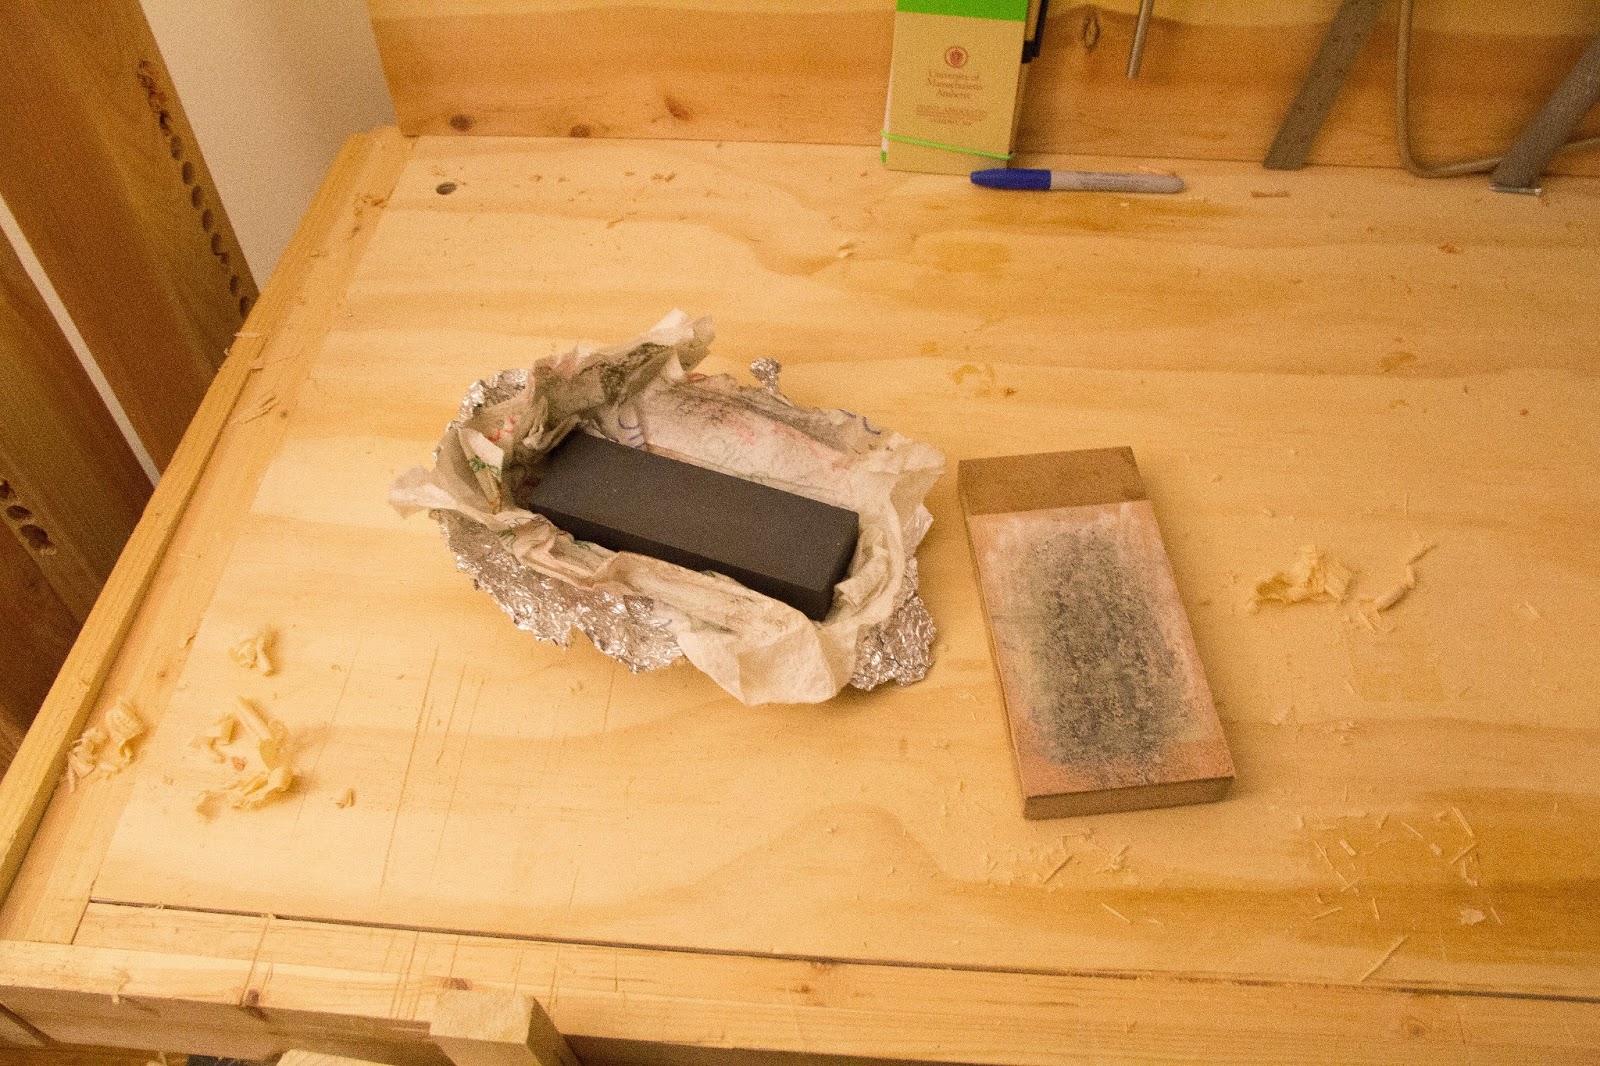
This is a kit of three diamond plates in a fitted wooden case.  The plates are 325 (blue), 600 (red), and 1200 (green) grit diamond mesh plates on a plastic substrate.  The wooden case is decent, and well enough fitted to prevent damage.  You can use the stones wet (with water) or dry.

How do they work?

Quite well.  Up until I got these I'd been using an old combination oil stone;  medium on one side, fine on the other.  It worked well, and still does, but oilstones are comparatively messy.  They must be oiled, and they tend to stain if you make the mistake of putting them down on cloth or wood.

I've done three real sharpening jobs with these.

First, the standard stuff.  Chisels that I'd gotten moderately sharp, then used until they were dull.  I skipped the coarse stone here, and did the 600 and 1200.  I always follow with a leather strop charged with some kind of yellow stropping compound.  I've lost the packaging and don't recall the details, so that's all I can tell you.  These worked great.  Taking curls off wet Douglas Fir end grain great.  I'm pretty sure my technique hasn't gotten that much better, so I have to assume the plates are a lot better than my old oilstone.

Second, a first-time setup.  I had a plane that I bought unused, but never did more than a cursory swipe over the oilstones.  So it had the factory grind and a little more, but had never been what you'd call "sharp".  I started that one on the red plate, but moved back to the blue when I figured out how flat the bevel wasn't.  Once the bevel was sharpening as if it was fairly flat, I moved to the red and green plates, followed by the strop.  This particular plane isn't what you'd call a precision tool (it's the Shelter Institute rabbet plane I reviewed last year), and I'm not very good at adjusting it, but it works a lot better now than it did.  It still needs some tweaking, though.

Finally, a damaged plane iron.  I have an old Stanley #5 that I use for stock removal.  It wasn't good for much else, because there was a big nick - maybe 1/32" deep, maybe a bit more --  I couldn't be bothered to remove from the edge.  I had a good #4 for smoothing, why do I need a #5 set up for it?  This was the real test.  The iron is exactly the same width as the plate (about 2"), and had been indifferently sharpened with the nick in it.  So I started with the blue 45 grit plate.  I still don't have the nick completely out, because I only had about 10 minutes to work.  It's faster than the 80 grit sandpaper I've used for grinding, and leaves a much nicer surface.  I followed it up with 20 strokes each on the red and green, then a few on the strop.   I also ground the back on the blue plate and polished the back on the green -- it's not quite mirror finished now, but it's pretty close, and the nick is almost entirely gone.  Total elapsed time on that blade, maybe 8 minutes.  It takes nicer shavings, too.

Final Thoughts

I'm not going to tell you to rush right out and buy a set of these.  They're nice, no doubt about it, but there are some limitations.  If you have a system you like, and it gets your tools as sharp as you want them, stick with those.  Don't give in to the new tool temptation.

So what were the limitations?  The main one is size.  These plates are 6"x2".  That's fine for chisels, pocket knives, and rabbet planes, but it's a challenge on anything big.  For the #5 that I was working on, I had two choices:  skew the iron and run it across at an angle, or use my fingers as runners to make sure it didn't slip off the edge.  With my try plane (an old Siegley 24" transitional), I won't have that choice:  it uses an iron about 2 5/8" across, so it will be skew or nothing.  If you don't sharpen any big tools, that's not a limitation.  For me, I'm considering buying a larger stone or plate just for my try plane.

Would I buy another?

If these vanished, I'd probably go get another diamond plate set.  That said, I think I'd look for a larger plate.  I'd like one large enough that I can sharpen any of my bench tools without having to skew them, and that means I need a stone at least 2 5/8" wide.  More than that would be better.

Tuesday, April 16, 2013

Grinding without a grinder

I'll admit it.  I'm terrified of powered grinders.  Last time I tried to use one I didn't grip the metal firmly enough, and it caught, shot down towards the floor, left a divot in the concrete between my feet, and wound up halfway across the garage.  Sooner or later I'll have to try again, but not soon, I hope.

But it does leave me with a dilemma.  Everyone occasionally nicks a blade, and chisels and plane irons are a little pricey to just throw away if they get nicked.  And grinding out a big nick on sandpaper is... well, my time may not be worth much, but it's worth more than that.  So what's a cowardly cheapskate to do?

Find a solution, that's what.

Here's how I deal with this problem.  Anyone else who has the same problem may like this solution too.

First, make sure you have a drill press, and that it's set nice and slow.  If you don't... well, go buy one.  They're less terrifying than grinders, and they have more uses.

Next, cut a wedge to the angle you want your iron sharpened at.  Screw that secondary bevel nonsense;  this is for the big bevel.  Make sure it's wider than the largest blade you'll want to sharpen, and not too long.  Also, make sure you can attach it firmly to your drill press table.

Third, go find a 3" or 4 1/2" sanding disk.  These things are moderately rigid, and they've got a hole around 3/8" in the middle.  Make it coarse:  80 grit works nicely, and I've used one at 60 grit that removed an amazing amount of metal in seconds.  Pick up an arbor that fits it;  that shouldn't be too hard.  Worst case, a bolt, washers, and two nuts should work, but try to find the real thing.

Fit the disk to the arbor, chuck the assembly up in the drill press, and fasten your nicked blade to the ramp.  Make sure it's not going to contact the arbor, and set the table so the blade is about an inch from the sanding disk.  More than that, and you'll wear out your arm.  Less, and you won't be able to see what you're doing.

Finally, start the drill press, and start bringing the disk down into contact with the blade.  Short touches:  not more than a couple seconds.  Each time there's contact you'll probably see sparks, and the blade will start heating up.  But at 60 grit and a few hundred RPM, it works fast;  you just need to keep bringing the disk down and checking to see if the blade is too hot.  If it is, spray it with water or stop for a while.

When you're done, the bevel will be heavily gouged by the rough paper, but you can take that out pretty easily with a coarse stone or some 80 grit sandpaper.

So there you have it.  A way to get rid of your grinder!  It's fast, it's easy, and it's pretty cheap, if you've already got a drill press.

Monday, March 4, 2013

My luggable toolbox.

Old portable computers used to be referred to as "luggables".  They were portable, sure, but they still weighed a ton.  They weren't something you'd be willing to put on your lap, not if you wanted to stand up again.

Well, that's the category my toolbox falls under.  When I was packing up to move, I decided to take some pictures of what goes into it.  I missed a few things, but here's the basic rundown.  Unfortunately, it's all still packed, and I can't easily dig things out, so some of the details may be wrong, but I'll be pretty close.

The box itself is an old Union brand tool box ("Tool Chest", according to the label) which my father's father used for storing hand saws.  Some of those saws, once they've been restored and sharpened, will make their way back into it.  It's just shy of three feet long, just long enough for my Disston rip saw, and if it was any bigger I might not be able to lift it when it was fully loaded.


The Contents

So what goes into it?  Unfortunately, I'm not able to give you a tool-by tool photo shoot.  Things go in pretty much as they fit, but I shot by categories.  So here's what we've got, roughly bottom to top.

Saws


I fit four saws in here.  The top three in the photo fit into the holder in the lid of the box.  From the top of the photo down, they are:
1) A Craftsman "Kromedge" cross-cut saw.  It's 8TPI, and it was indifferently sharpened by a professional with a sharpening machine last summer.  I'll be re-sharpening it by hand, and probably reducing the set, too.  This one was my father's, and may be the one of the reasons I thought I hated hand saws until I'd worked with a newly sharpened saw.  It's better now, but it needs more work.

2) An old Disston.  It's about 5 1/2TPI, filed rip, and it's the first saw I did a restoration on, and the first saw I filed.  It cuts beautifully, and convinced me that hand tools are worth using.

3) A Shark brand Ryoba.  This is a travesty of a tool.  Machine stamped.  Machine filed.  Impulse hardened teeth.  Plastic grip, with plastic pegs holding the blade in.  And yet... I can't work without it.  It cuts so smoothly I sometimes don't need to plane or sand.  It's quick, it's reliable, and I can split a line the width of a two by four in seconds.  I've used it for cutting dovetails in pine and ripping oak.  You might have guessed by now that I'm a little conflicted about this saw, but it's earned its place in my tool box.

4) A gent's saw.  I don't even know the brand... as far as I can tell, the brand name is "Professional Quality", which seems like cheating to me.  It needs sharpening, but it's not bad.  I paid about $15 for it, and it works for small cuts in soft wood.  This one gets tucked in the side of the box wherever it will fit without the teeth hitting anything metal.

Hand Planes & Chisels


Generally speaking I put three planes in this box.  The largest, near the back, is a Ward's Master #4.  It will take a deep cut if I'm careful, or take feathery thin shavings for smoothing.  It's no good as a jointer, but I figure I'm not going to be doing any large scale work straight from this box anyway.  If I replace the box with something larger, I'll add a #6 or so, and if I know I'm going to want a longer plane I can replace this one with a #6.  It'll just about fit.

The second is a Millers Falls #85.  I use it for everything.  It works remarkably well for thinning stock, and of course it's a decent rabbet plane.  There's no depth gauge on it -- it was lost long before I got the thing -- but I can live with that.  That's what a marking gauge is for.

The last is a Craftsman block plane, and I have sort of a hate/hate relationship with it.  I keep it because my father gave it to me, and there are times when nothing else will fit.  But it's got no lateral adjustment at all, and the depth adjustment is so coarse as to be of questionable value.  Hopefully someday I'll get a better one, and this one can retire to a shelf in the shop.

These are the chisels I use most often, ranging from 1" down to 1/4".  They travel rolled up that piece of suede to protect both them and everything around them.  I flop the edge up over the blades, roll it so they can't touch, and then fold the other edge over the whole thing.  Takes about two seconds, and when I get around to sewing pockets in I'll already know where to put them.  The chisel roll goes in the top of the case, more for spacing than any belief that I'll need chisels more often than planes.

Drills and bits


 Yep, that's a Ryobi drill bit roll.  And it's mostly got Ryobi bits in it.  They're OK, and I'm replacing them slowly as they dull. Some of them I haven't used yet,and the masonry bits I'll probably never use, especially with a brace.  But the rest are good enough.

The brace was made by Craftsman, and while the ratchet works beautifully, there's just no way to get it to grip a round drill bit.  It will hold just long enough to get the bit about 1/8" into the wood, then let it start to turn.  But it works like a charm when fitted with an old tapered square shank bit (which I have, I just forgot to get them in the picture), and the hex adapter in the picture lets it drive screws like you wouldn't believe.

The eggbeater, on the other hand, works great, and grips a round-shanked drill bit just fine.  It'll drill up to a quarter inch, and above that I have either an auger bit or an electric drill.

These generally both go as near the top of the box as I can get them, since I want them more often than any other tool except a tape measure.


Marking and Measuring


The six inch try square was cheap at a flea market, and almost square.  I committed a mortal sin by filing it square, and now it's perfect.  

The Empire brand bevel was a complete waste of money, but it's the only one I have, so I use it.  Someday I'll find a better one.  The Empire brand combination square, on the other hand, was a happy surprise:  it was cheap, and it's accurate.  I have no idea how that happened, and I check it regularly to make sure it's staying accurate, but it's good to within the limits of my ability to test, which means it's well within the tolerances of my work.  

The marking gauges... wow.  Opposite ends of the scale, here.  One is a Veritas gauge, and is as good as you'd expect.  The other is a Harbor Freight mortise gauge, and is... well, about as good as you'd expect.  Maybe a bit better.  Filing the pins helped, and I'm learning to make better use of it, but it'll never be my favorite tool.

The last tool here is just a metal rule, marked in metric and imperial, with a cork backing.  It's occasionally useful, and so small and light I just toss it in for lack of a better place to store it.

Miscellaneous


These are not glamorous tools.  The hammer is ancient, and fits my hand perfectly.  I wouldn't want to use it for driving heavy construction nails, but for anything I'm likely to work with using these tools, it's great.  The mallet... is a Harbor Freight panel mallet.  I use it for tapping chisels, adjusting planes, and generally hitting things I don't want to hit with metal.  It works, and it was so cheap I won't care when it breaks.

The screwdriver, coping saw, and level are all Home Depot specials... cheap and functional, but not very good.  Actually, that's not true:  the screwdriver is as good (and as bad) as any other mid-range screwdriver, and has four bits and two hex drivers.  The level is accurate, light, and has a magnet in one side and a V-shaped trough in the other, so it will stick to or balance on just about anything.  The coping saw pretty much sucks, though.

The spokeshave... well, I don't know whether the problem is it, or me, but it's not very good.  I'm betting on a combination of the two.

Do I really need to say anything about the notebook?

Sharpening


These days I'm mostly using a set of DMT diamond plates for sharpening in the shop, but the stone is more portable.  The paper towel holds some mineral oil, and the foil keeps it off everything else.  I've found that between the stone (it's coarse on one side, fine on the other, and was made by Brookstone so long ago that they no longer admit to having manufactured it) and the strop, I can put a pretty good edge on a chisel or plane iron.

Apron Tools


This is my embarrassment of a shop apron, and the tools that live in it.  As you can see, I shot this picture as I was finishing up a project, and hadn't cleaned the rasp off yet.  Oops.  All simple stuff, here:  the mechanical pencil was cheap and will be easy to replace when I break or lose it.  The 4-in-1 rasp was likewise cheap, and I pay for that every time I use it.  It's not bad enough to throw away yet, though.  The Stanley knife is completely standard.

The square... well, that's a little weird.  It IS square, but the markings are inches on one edge and centimeters on the other, and it's kind of annoying to have to remember which edge I'm looking at.  It was free, though, and I like having a square I can drop in my apron pocket (the bigger one is 16" -- a little long for a pocket!). The tape I picked up for $1 at a flea market, and it's marked only in inches.  No feet, no highlighting for stud distances, just inches and fractions of inches, down to eighths.  Oddly, it matches my other rulers and tapes at 6" and 12", but not at 8".  I have no idea why.  There are a few other marks that aren't quite right, but as long as I use just this tape throughout, it doesn't really matter.

The apron is tiny, and started out life as a tool to hold roofing nails.  It works great.


So there you have it.  That's (almost) everything I put in my tool box when I want to travel and might want to do some carpentry-type woodworking.  You can see in the final picture that I manage to squeeze a few 16" clamps in, but that's about all there's space for.  And as for weight... I can't actually use the handle to lift the box:  the whole top bows, and I'm afraid the handle may break.  Maybe I need a second box, or a real portable chest....


Book Review 3: Civil War Woodworking

The third in a series of book reviews.

The same disclaimer as usual applies:  I am, if no longer a beginner, then nowhere near a master.  Not even a journeyman.  I have a little experience, a lot of theoretical knowledge, and loads of opinions.  So take these reviews with a grain of salt.

First Thoughts:

This review is of Civil War Woodworking, by A. J. Hamler.  It's not quite the same as the other two books I've reviewed so far.  Those were really focused on teaching you about hand tools, and how to use them.  This book, despite discussing projects from before the age of electric power tools, assumes the use of power tools almost exclusively, and doesn't talk much about technique.  Instead, it's a collection of 17 plans for furniture and camp equipment from the era of the American Civil War.  

Overall, I like the book a lot.  Several of the projects are now on my "Try to get around to this sometime" list, and some are on my "Do this as soon as your new shop is set up!" list.  While the suggestions for how to use power tools to achieve results that look like they were done with historically accurate tools occasionally irritate me ("Look, if you'd just use the right tool, you wouldn't HAVE to spend time making it look right!"), that wasn't the focus of the book, and I was able to ignore it. 

Now, on to the details!

Details:

The book is basically divided into two main sections, plus a list of references and resources at the end.

The first section begins with historical information, and a discussion about "authenticity" and the idea of a "historically correct" campsite.  I enjoyed the discussion, and found some of it useful in a general sense, but I really wanted a book on woodworking:  Going through the first section (about 10 pages) had me a little concerned that this was going to be a book about reenactment, with a few nods in the direction of woodworking.  Starting around page 11, there's discussion about historical woodworking, and how the stock and tools have changed since the Civil War (spoiler:  not as much as you might expect, advent of power tools notwithstanding).

The real meat of the book, for me, starts on page 28, with the first of projects.  The projects in the book range from the quick-and-dirty (five-board bench, hardtack crate) to somewhat more complex (officer's field desk, Lt. Kelly's camp chair).  Some of them build on earlier projects:  the field desk, for instance, is designed as dividers and modifications to a hardtack crate, since that's how some of them would have been built.

One detail I enjoyed was the sidebars:  for instance, in the section on building a hardtack crate, Mr. Hamler included a recipe for hardtack.  Do you need one?  Probably not.  Does it have anything to do with woodworking?  Nope!  But it's an interesting addition, and if you're really planning to do reenactment, having hardtack available might be useful, so why not have some?

Each of the 17 projects begins with a description of its historical provenance:  where Mr. Hamler found the description, where the photos (if any) came from, and how it would have been used.  For some things -- most notably the hardtack and ammunition crates -- he is able to quote Army regulations on construction technique and sizing.  In other cases, he has existing historical artifacts to draw from, or sometimes just photos.  One of the projects on my "Do it soon!" list is Lt. Kelly's camp chair, which he found three photos of from different angles.  While the original is almost certainly long gone, the photos gave enough information to produce a good replica.

From historical information, Mr. Hamler moves on to materials and construction.  For the most part, standard 3/4" stock is perfectly usable, but Mr. Hamler pushes the idea of using different sizes.  Why?  Well, because 3/4" wasn't really a standard, historically.  So if you're going to use it, that's fine, but it shouldn't be everywhere.  That's one of his complaints about the camp furniture that's so common with reenactors;  too much of it is made from standard sized lumber.  Once he's explained what lumber to use, he moves on to layout and technique.  This is possibly where the book is most lacking.

Mr. Hamler is mostly concerned with historical information.  That's not a bad thing, necessarily, but it means that many of the projects are a bit sparse on construction detail.  There's plenty of information to figure it out if you have a little experience -- I didn't have any trouble reading between the lines, and I'm barely an apprentice, skills-wise -- but don't expect layout diagrams and cut-lists like you'll find in a woodworking magazine.  They don't exist, for the most part.  He does discuss each component necessary, and the joints used, and usually in quite a lot of detail, but the instructions are sometimes a little disjointed.  Really, though, that's my only complaint with the book, and I certainly feel confident that I could easily come up with a plan for any of the projects in the book.  And if I can, then anyone with the skill to use the necessary tools should really be able to.

Final Thoughts:


So what else is there to say?  I highly recommend the book for anyone who wants to do reenactment.  Whether they're planning to build their own furniture or not, there's a lot of excellent information here.  If you plan to build camp furniture for Civil War reenactment, I'd say buying the book is a no-brainer.  There's good historical information, there's good construction information, and the photos give a clear sense of how things were actually used.

But what if you're not a reenactor?  Well, then it gets a little more iffy.  I'm not, and I don't expect to be.  I'm still planning to do a few of the projects:  that camp chair would go quite nicely on my front porch, and the stool would make a nice foot-rest to go with it, or just as extra seating.  While I don't need a folding camp mirror, I have friends who would probably enjoy having something like it as a simple portable mirror.  I've already got a five-board bench on my porch, made by my grandfather, and making another to match it would even out the porch quite nicely.  So sure... if you're not into reenactment, but you are a woodworker, you may well get value out of the book.  I certainly have, so I can recommend it whole-heartedly.

Book Review 2: "The New Traditional Woodworker"

So this second review will be a lot more positive than the first one.

The same disclaimer as last time applies:  I am, if no longer a beginner, then nowhere near a master.  Not even a journeyman.  I have a little experience, a lot of theoretical knowledge, and loads of opinions.  So take these reviews with a grain of salt.


First Thoughts:


The second book I got was "The New Traditional Woodworker", by Jim Tolpin.  Again, let's get the first response out of the way:  I quite liked this one.

"I didn't think I would need to write another book on woodworking" starts out Mr. Tolpin.  "I figured the ten other books I wrote on the subject pretty much covered it..." 

As you might expect, Mr. Tolpin figured out he was wrong.  All those earlier books focused on power tools, and he found he wanted to write one on hand tools.

While much of the information in the book is fairly general, Mr. Tolpin covers a lot of ground in a fairly limited amount of space.  I think his decisions about what to include and what to leave out, while not always the ones I would have made, were mostly good ones  He manages to cover enough information that someone completely new to hand-tool woodworking would probably be able to at least figure out how to get through it, and someone with power tool experience would have no trouble at all.

Details:

Let's talk for a minute about the structure of the book.  The book is roughly divided into three sections.  The first is what you might call philosophical:  the mindset involved in using hand tools, and why you might want to acquire that mindset.  The second is equipment:  descriptions of types of tools.  The third section is project-based:  tools you can make for your shop.  Now, for a bit more detail.

1) Philosophy

"My five-year-old son learned in less than ten minutes how to cut accurately to length using a backsaw and bench hook.  The dog, however, took a little longer..."  (p10)
This section was the shortest, and is the one I have the least to say about.  Mr. Tolpin talks a lot about why you might want to work with hand tools, but it all boils down to things other people have said:  it's quieter, it's cleaner, and if you're not trying to mass produce, it's usually more fun and not all that much slower.  I like it, but if you're reading the book you probably already know most of it.  He does talk a little about shop layout here, as well as types of benches, but it's mostly old news and not very technical.

2) Tools

"When you pay home and garden store prices, what you get are tools that are -- how can I put this delicately -- garden variety." (p29)
This is where the real content begins.  Mr. Tolpin discusses both general classes of tools and specifics within those classes.  The classes he uses are:

  • Layout Tools
  • Tools for Changing the Size of the Board
  • Tools for Creating Planes and Angles
  • Tools for Joinery
  • Tools for Shaping Edges
  • Tools for Smoothing the Wood
  • Tools for Making Holes
  • Tools for Assembling Parts
  • (Non-Human) Powered Tools
  • Sharpening
For each of those categories except the last two, each is broken down into smaller subsets ("Tools for Laying out Curved Lines") and specific tools ("Marking Gauges").  For each tool, there are three sections:
  • What They Do:  This section explains exactly what the tooldoes, why you want one, and gives some specific examples of use.
  • How They Do It:  This has details of how the tool is designed, and sometimes why it's designed that way, and how you make use of it.  Sometimes that's simple (marking gauges) and sometimes it's a little more involved (bench planes), but he keeps to a fairly low level of detail here.
  • Which Ones You Need:  This is basically a bare-bones list of the minimal kit you're going to want of this particular tool, with some sketchy explanation of why.
As seems to be common among hand-tool woodworkers, the two places Mr. Tolpin compromises are a bandsaw and a drill press, both of which speed up and simplify things that are hard or tedious with hand-tools (ripping or resawing long boards, cutting long curves, or drilling large numbers of accurate holes).  

As for sharpening, he covers the basics.  What is a sharp blade, why should you grind a blade, why is hollow-ground easier to sharpen, and things like that.  He uses a combination of sandpaper, waterstones, and powered grinders and sanders, depending on what he's sharpening, and gives at least enough information to get started.  I cant' really judge the accuracy of a lot of his instruction here, because I don't use any of those methods these days.  For what it's worth, nothing he said struck me as inherently wrong, just not the way I do things.

3) Projects

"Because it is your body that is providing the energy source for the tools (all 1/5th horsepower of it!), the ability to sharpen and properly set up or configure a tool becomes paramount..." (p73)
Mr. Tolpin starts this section with a lot of general information, including a chart on "Handtool-Friendly American Furniture Woods", with comments, species name, specific gravity at 12% moisture, stability, strength, and hardness.  He also includes information on selecting wood, why it warps, and how to figure out which way it warps.

He then moves on to the projects.  In order, they are:


  • Straightedge
  • Try Squares
  • Winding Sticks
  • Face Planing Stop
  • Bench Hook Pair
  • Edge Planing Stop
  • Sticking Board
  • Workbench Tote
  • Oiling Pad (probably the simplest project in the book!)
  • Diagonal Testing Stick
  • Vise for Sharpening Saws and Scrapers
  • Sawbench Pair
  • Waste Backing Block
  • Drawing Bows (for drawing curves)
  • Sticking Board for Dowels
For each project, he moves through a similar set of sub-sections to the tool section.  He starts by explaining what the thing is used for, and why it will be useful to you.  He also lists what skills he introduces with the project, and what tools it uses for the first time.  In several cases, the project uses the tools from earlier projects, and the skills generally advance from the first project to the last.

Mr. Tolpin then goes through the process of actually building the thing.  For some projects -- like the Oiling Pad -- that takes up about two paragraphs.  For some, like the bench hook pair, that's 15 pages of detailed text and photos.  His approach mostly works for me;  there are a few places I find his explanations to be too vague or too in depth, but since everyone has a different background, I can't say how it will work for you.  In general, I'd say anyone with a little experience should be able to work through all the projects in order.

The Projects section ends with a description (again, with photos) of the process of squaring and truing all six sides of a board, which is a nice addition. 

Final Thoughts:

So what else is there to say about this book?

There are a few problems with it.  The big one as far as projects go is the old paradox of woodworking:  you need a square to make a square, and the same holds true for a lot of projects here.  It's hard to figure out if your straightedge is true if you don't have a straightedge, it's hard to build a sawbench without a good place to make cuts in large pieces of lumber, and so on.  Mr. Tolpin does make some good suggestions about how to work around some of these problems, but there's only so much you can do about others.

The only other real complaint I have about the book is the editing.  There are a number of typos, misuses of apostrophes, and things like that.  Does it detract factually from the book?  No.  Will most people notice them?  Again, no.  But sloppy editing in a published book bothers me.

The book is somewhat limited by space;  there are places where the discussion of a tool or project is a little bit sketchy, but if he'd gone into full detail about everything this would have been an encyclopedia, not a reasonably priced book.

Overall, I can happily recommend this book.  It's got a lot of good information in it, and it's mostly well written and useful.

Saturday, December 29, 2012

Book review 1: "The Seven Essentials of Woodworking"

I got a handful of woodworking books for Christmas, from my family.  I guess this is an easy hobby to buy for, at least when you're as much of a beginner as I am.  Anyway, all of them were interesting, and I decided I'd write reviews of at least a few.

First, the disclaimer:  I am, if no longer a beginner, then nowhere near a master.  Not even a journeyman.  I have a little experience, a lot of theoretical knowledge, and loads of opinions.  So take these reviews with a grain of salt.

The first book is The Seven Essentials of Woodworking, by Anthony Guidice.

First Thoughts:


I'm going to get this out of the way, right up front:  I didn't like the book.  I can't honestly recommend it to a raw beginner, and it's arguably too basic for a non-beginner.  However, that isn't due to factual content, or technique.  Within my experience, most of what he wrote is true, or at least not untrue.  The techniques he discusses are good ones, the tools he recommends are, to my knowledge, excellent, and he makes some good points about some of the common beliefs in woodworking.  And yet...

What I can't get past is Mr. Guidice's attitude.  Look, I'm an IT guy in my daily life.  I've told people, fairly seriously, that every IT person knows there's only one appropriate response to a problem.  Now, if only we could get any two IT people to agree on a response...  Much the same is true of woodworkers, or at least woodworking books.  Crafters in general tend to separate into camps more than IT people do, but there's still a sense of "Other ways work, but mine is best."  I'm used to that.  It amuses me more than anything.

What bothers me here is that it's taken to an extreme in this book.  Mr. Guidice appears to take the attitude that no one who disagrees with him can be considered an expert.  Really.  A quote from the book:  'I am very much aware that some of the precepts in this book are contrary to what is often written in woodworking books and magazines, and may be challenged by "experts."'  (p 12)

Right there, in the introduction, he's set up the claim that no one who challenges him can be an expert.  That bothers me, because it denies any chance for discussion.  Someone who says "Other people may disagree with me.  That's fine, but this is my way, and here's why I like it." opens the door for discussion or debate.  This closes that door, and sets up the author as the ultimate authority.  This isn't an isolated example, by the way, it's just the one that I happened on first when I went looking for a quote.

So if you're a beginner and you're reading this, remember:  his techniques are good, and his information is good.  But other people also have good techniques and information, and it's not always the same as what you'll see in this book.

Details:

The book covers, as you might guess, seven general topics.  In order, they are:

  1. Wood, gluing, and joint strength.
  2. Measuring and marking.
  3. Sawing.
  4. Sharpening
  5. Hand planes.
  6. Mortise and tenon joints
  7. Finishing.
While people might argue about order, and whether there should be other things on the list, I think most woodworkers would agree these are all pretty important.  I'm not going to try to talk about every section here, but I'll touch on a few things.

I've got no argument with anything (except the aforementioned attitude) in the first two sections.  What he says about how to handle things makes as much sense as anything else I've read, and more than some of it.  (The internet is a truly vast repository of badly written garbage.  My hope with this blog is to increase the average quality of the garbage.)

In the third section, though, I have some questions.  Mr. Guidice is very firmly opposed to what I think of as traditional saws;  he makes no bones about the fact that he hates backsaws ("Backsaws are heavy, difficult to balance, and unwieldy... And it doesn't cut well, either." p 26) and carpenter's saws ("The backsaw does not have the worst design I've ever seen; the standard carpenter's handsaw... has a thicker blade and bigger teeth, whips and kinks in the cut, and cuts even more slowly." p 26).  What does he like?  Bow saws.  I've never used a bow saw for woodworking;  I have one I love for cutting up downed trees, but not for anything finer than that.  He may well be right, but I find it interesting that he so despises tools that so many woodworkers love.  My handsaws don't seem inclined to "whip and kink in the cut" unless I do something wrong, and they cut quite quickly.  I can't help wondering, in fact, whether his hatred of the form has more to do with early bad experiences than the form itself.

Once that's done, I really run out of problems with Mr. Guidice's ideas.  Again, he frequently includes short complaints about people who disagree with him, but his facts and techniques seem to be fairly standard.

My one other note comes mainly from the section on planes.  One argument he makes, which I have trouble arguing with, is that beginners who want to do serious woodwork should just buy good quality brand new planes, and not mess around with trying to restore vintage ones.  Just about the only specific tool he recommends in the book is the Lie-Nielson low angle jack plane.  It gets fantastic reviews from everyone I've seen review it, so I can't really fault him.  But... well, not everyone can afford to spend $200+ on a hand plane.  That's more than I've spent on all my planes put together, and possibly more than I've spent on all my hand tools put together (though I was helped out there by some nice tools being passed down to me).

And really, that's my problem with the whole book.  I've read other authors who say things like "The best choice is to go get a new plane from a good manufacturer.  You'll find out what a really good tool feels like, and you won't have to mess around with it.  It'll just work.  But if you can't afford that, here are some resources for helping you tune up an old plane into something quite good."  That, to me, is reasonable.  Mr. Guidice says, in essence, "Go buy a new plane.  If you're not going to do that, stop wasting my time and go find a different hobby."  Again, shutting down discussion rather than encouraging it.

Finally, one positive note:  His section on finishes is the clearest I've read.  Seriously.  Low on attitude, high on information.  It all backs up other things I've read, with a good organizational structure.  It worked for me.

Final Thoughts:

As I said initially, I can't recommend this book, really to anyone.  The author is just too opinionated, and that colors the whole book for me.  I've found most of the information (though he talked more about bow saws than anyone else I've read) other places, with less "I'm right and everyone else is dumb" attitude.

Is it, though, actually a bad book?  I'd have to say no.  The information is clearly presented, and the author appears to know his subject.  He's opinionated, not wrong.  The fact that I don't like it doesn't change the fact that, for many things, his methods will work, and work well.  If you're willing to overlook the slanted opinions, or if you don't have easy access to another book, give it a read.  If you want something balanced, go read something else.

Wednesday, December 12, 2012

An inexpensive bench

I know, there's a ton of these posts.  Every woodworker out there has written about their bench.  I'm going to write one anyway.  Here's a pretty picture to get you through the mounds of text you're about to see:


1) Design Criteria.

   I wanted a bench I could use indoors, since my usual shop is an unheated garage.  I knew I'd only be using hand tools (nothing powered), so I focused on that.  It was going in a small room that also had a few craft tables in it, so I needed to be able to pack everything up on it, and I wasn't going to be able to hang pegboard or cabinets, so tool storage was important.  So the final list ran:

   - Heavy!  I don't want it moving while I'm planing.
   - Not too big.  I originally wanted 2'x5', but wound up settling for about 2'x4'.
   - Good vise.  I wanted a heavy duty vise on the left end.
   - Decent storage space, with the option to use holdfasts once I get around to buying some.  (Meaning it needed to have 7" of space between the surface of the bench and the top shelf for the holdfasts I was looking at).
   - Cheap.  I don't have a lot of money to spend on this hobby, so price mattered.
   - Finally, it couldn't be ugly.  It was going in a living space, and guests and my girlfriend would see it on a regular basis.

   I finally settled on a modified version of a bench I saw in either Shopnotes or Woodsmith magazine;  the article was titled something like "Heirloom Workbench", and I could find it again if anyone wants to know where it came from.

2) Materials and cost.

  As best I can figure, the wood I used would have cost me about $110-120 if I'd bought it all specifically for the project.  However, I didn't;  quite a lot of it was scrap or leftovers from other projects.  I think I spent around $85 on new wood for this.  The fasteners were all things I had already;  mainly drywall screws and four "TimberLok" 6" fasteners.

  The legs are 4x4 Douglas Fir.  Two eight foot pieces covered it nicely, with some left over.  A twelve footer would have been more efficient (less waste), but there weren't any good ones and they're hard to transport anyway.  The shelves, sides, back (missing in the above photo), and top are all 3/4" cabinet grade plywood from a big box store.  I pretty much used up two full sheets, one for the top and one for the rest of the "box".  Trim and the tool rack are 1x pine, and the leg vise is 2x6 pine, as I recall... it might have started out 2x8, but I'm not sure.

  That brings me to the most expensive piece:  the vise screw.  Look, I could have gone cheap.  ShopFox and Jorgensen both have screws on Amazon for about $20-30.  But I wanted bulk.  I wanted a seriously heavy screw.  So I spent close to $80, and bought a screw from woodcraft.  It's an inch and a quarter across, and weighs a ton.  It's got something like three threads per inch, and you can crank it down hard enough to damage the wood of the vise.  That said, I probably would have been just fine with the $30 one from ShopFox... and I wouldn't have doubled the price of the bench to do it.  Oh well... lessons learned, I suppose, and I really don't regret it.

3)  Features and construction.

  As best I can figure, the bench weighs in at somewhere between 200 and 250 pounds.  3/4" ply weighs around 72 pounds per sheet, as best as I can find.  (If it were actually 3/4", it would probably weigh 75.  But it's not... it's just under.)  Douglas Fir is heavier than pine, which is one reason I chose it.  I also like the way it looks.  A foot of Douglas Fir 4x4 should weigh around 5-6 pounds, and I used something like twelve feet, and another four feet or so of DF 2x4.  Figure a total equivalent of fourteen feet at 5. pounds each (it's quite dry), and you get 77 pounds.  Another few pounds for the pine trim, and you get about 80 pounds of solid wood.  I'm guessing around 135 pounds for the plywood -- I didn't use all of it -- and the tool rack probably weighs in around 8-10 pounds.  So... without tools, about 225 pounds.  Not bad for a bench with two feet by four feet of workspace!  Placed on a rubber mat as it is, it's just not going to go anywhere.  It vibrates, certainly, and things in the tool rack tend to swing around, but it feels solid.

  Let's start with the easy part.  Each of the four legs has, essentially, a stopped rabbet in it on the inside corner.  The sides of the "box," the open area below the top shelf, fit into the rabbets and are fastened with drywall screws.  There's a gap above those 3/4", then another small piece to fill in above the top shelf.  The front and back rails, which form the edge of the bottom shelf, are made of Douglas Fir 2x4, and fitted to the legs with BIG mortises.  The mortises were started with a drill press, and finished, as I recall, with a 1" chisel.  The rails are glued and pegged, so they're not coming apart any time soon.  The back just kind of slots in between the top and bottom shelf... which is why it's missing from the picture.  The space is slightly larger than the panel, and it fell out while I was moving the bench.  Oops.  The rails are also rabbeted, end to end, to take the bottom shelf.  That shelf is basically a pressure fit -- it's constrained by the rabbets front and back, and the plywood sides on each end.

  Further holes in the legs:  I punched three through-holes in the right front leg.  Why?  Well, because then I can put pegs in to support longer pieces that I'm holding in the vise.  I've only wanted that once, but it worked well.  The holes are 3/4", so the holdfasts I'm planning on should also work with those holes.  On the left front leg, there's one big hole -- about 1 3/8" -- for the vise screw to pass through.  The nut for the screw is fastened to the back of the leg.  This is the one piece I'd change if I had the option.  It works, but it's clunky.  I'd be happier if I had bored a larger hole and mortised in the nut; it would look better and be easier to manage.  I may, eventually, jam a dowel or something in and redrill, but that's a project for another month.

  The top is four layers of 3/4" plywood, with two layers of pine banding around the edges.  The bottom three layers of ply are glued and screwed together, and the top fits in inside the banding, being held in place by that and the tool rack on the back.  In retrospect, I overcomplicated the whole process.  There are two sizes of plywood sheet (the bottom piece is 3/4" deeper and 1 1/2" wider), and the banding has two heights (the inside piece sits on top of the step created by the bottom sheet of ply, and the outer piece is just glued to the inner piece.  It works great -- it's unbelievable solid, even with the top piece not fastened on in any way -- but it was harder than it needed to be.  If I were doing it again, I'd cut all four pieces identically, and glue and  peg the banding onto the bottom three layers.

  So how did I attach the top, I hear you cry?  Well, that's where the TimberLok fasteners came in.  I drilled and countersunk pilot holes through the bottom three layers of ply, and drove the fasteners straight through into the legs.  Not, perhaps, quite as elegant as cutting mortises for the legs to fit into, but it was cheap, easy, quick, and I'd do it again in a heartbeat.  There's nearly an inch of wood between the bench top and the fasteners, so cutting into them and damaging a tool is unlikely, and they can be taken out and reused if I ever want to re-build the bench.

  Really, that's it.  The most complicated joinery is some stopped rabbets for the plywood.  Some pilot holes were drilled with a drill press, some were done with an eggbeater drill.  Almost all the screws were driven with a brace or a screwdriver, since my power driver died just before I started this project.

The Planing Stop:

   You might see an odd piece of wood hanging off the left end in the photo above.  Here's a better shot:


That's a very simple planing stop.  It offers support from the front of the bench to the back, and can be adjusted to be as high or as low as I've ever wanted.  It's not perfect, but it was quick and easy.


The Vise:


  The vise is ridiculously simple.  It's just a slightly shaped chunk of 2x pine, with a vise screw through it a couple feet up.  That odd little bracket at the bottom deserves a closer look, though.  The problem with a leg vise is that it tends to tilt if the bottom isn't kept steady.  The traditional solution seems to be a straight piece, mortised into the bottom, that runs through a mortise in the leg.  That then has a bunch of holes drilled in it, and a pin is used to restrict how far it can move.  I went simpler.  I screwed a short piece of aluminum bar stock to the back of the front leg, and two pieces of 1x2 to the sides of the chop.  The 1x2 pieces have notches cut every 3/4", more or less, which act to prevent the bottom of the vise from moving when the screw is turned.  I've used it to hold stock less than 1/2" thick, and more than 8" thick.  Neither had problems, and I see no reason to believe that will change.  I did notice recently that it tends to bow a bit if I really crank down, but it still seems to hold perfectly well, so I'm not going to stress about it.

The Ends:

  Seeing as there was all this unused space at each end, I put a couple of racks on the bench.  At the right end it's just some 1x scrap, rabbeted and glued together into an L shape.  That was then screwed to the bench to hold clamps.  It works pretty well.


  At the other end, I screwed a single piece across, leg to leg, and put some nails in to hang two of my cheap saws from.  I'm also planning to add shaped hangers for a couple of nicer saws, but haven't yet, so those sit next to the bench instead.


Final Notes:

  Scroll way back to the beginning, to that first picture, then come back.  Done?  Good.  What you see in that shot is essentially my most-used tool set.  I have a toolbox that can hold everything that's sitting on the bench except the jointing plane (bottom shelf, on the right), and if I'm going somewhere where I know there'll be a bench and I may have time, I bring them.  The things that also travel with that aren't in that shot are:  
  - A two sided sharpening stone and a leather strop
  - A pile of auger bits for the brace, along with a hex adapter for it.
  - A cheapo (Ryobi) roll of drill bits and driver bits.
  - I generally replace the black-bladed Stanley FatMax saw with a nice old Diston, but sometimes both go with.
  - You can't see it, but there's a saw-sharpening file on the back of the worksurface.  That goes with too, although I don't really expect to use it.


  If I was doing this again, I'd pretty much make the same choices.  In the long run, I hope to add storage under the top shelf;  three drawers on one side, and a cabinet on the other, though I may go with just six drawers.  I might also go a bit cheaper on the screw.  In the end, that screw can put enough force on the chop that I fully expect it to break someday.  A cheaper one would likely have been entirely adequate, and brought the total cost under $150.  That said, I'll probably never be happy with a standard face vise again.  There's just too much benefit to the way the leg vise works for me.

  In any case, there you have it.  A nice bench for under $200, that could be brought under $150 by compromising on the screw.