Showing posts with label bench. Show all posts

Thursday, February 25, 2016

Design Notebook: A New Bench

Another "thought exercise" sort of post.

Background & Purpose

One of the projects I've been (slowly) working on is clearing my garage to a point where I can use it as a shop.  It's going to take some time, since I'll also have to insulate it, but I've made a start.  One thing I've recently started giving serious consideration to is the bench.  What I'm using right now is roughly two feet deep by four feet long.  It's great for the space I have, but if I'm going to have more space, I want a larger bench.

I've been going back and forth on this internally for quite a while, and it may happen again, but I think I've figured out roughly what I want.  My two initial impulses were an English-style bench, with a wide apron and nothing underneath, or a Shaker style bench, with lots of built-in storage.  I think I've settled on the Shaker type, largely because I like the way they look.  The other advantage is that I know from experience that I'll keep piling things under my bench until any open space is full, and a Shaker bench will at least force me to get things somewhat organized.

Requirements

What I've thought about so far:

1) Weight.  It needs to be heavy to stay still, and shouldn't need to be moved within the shop very often.  A Shaker bench is good for weight, given the drawers.  However, I'm sure I'll move house again, so it should be possible to either break it down or somehow make it, if not portable, then at least moveable.

2) Tail Vise.  I'd like a tail vise of some sort... I'm leaning towards something like this, which seems to be the new standard.  It should be both more solid and easier to build than a traditional vise, and more useful than a wagon vise.


3) Front vise.  I'm torn on this one.  I love my leg vise:  If I were doing it again, I'd build it out of something harder and stiffer than pine, but using it is great.  On the other hand, it does have some shortcomings.  I'd really like to try a shoulder vise, which is something that would fit a lot better on a large bench than my little one.  What I'll likely do is build up a shoulder vise and attach it with Timber Lok screws, which would certainly provide enough strength to keep it stable.  If I end up not liking it, I'll either install a metal quick-release vise or another leg vise.

4) Holdfasts.  I'm not willing to give up my holdfasts, so I'll need to leave a gap under the benchtop.  The top plus the gap needs to total about 7", which is quite doable.  I'd like to shoot for a 3" top with 4" underneath.  I'll probably leave that space open, since it's not ideal for storage, and hang a shelf over the bench for the things I store there now.

5) Board jack/sliding deadman.  One of the things I dislike on my current bench is trying to support long pieces of wood.  I'd originally planned to replace it with an English-style bench with an apron, but I think I like the idea of the board jack better.  It will also leave some space for...

6) Storage.  I'm torn on this.  On the one hand, I can always use more storage.  On the other hand, I like working out of my toolchest, and I'm not sure I love the idea of having access potentially blocked by whatever I'm working on.  I think the drawers will likely end up filled with things like hinges, fasteners, and the like, with maybe a few rarely-used tools to fill out the set.  I can't know what I'm going to wind up putting in them until I've got it built, though, so I'm not going to worry about it.  One thing I do know is that I want the drawers to be transportable:  What I'm thinking at the moment is that for each drawer I'll cut a piece of wood (possibly 1/4" ply) for a top, and store it under the drawer.  When the time comes to move, I'll be able to pull out the drawer, tack the top in place with nails, and stack it in the moving van.  That way I can move the bench without all the drawers, and the drawers can stay packed while I move everything.

7) Top.  My current bench is just about 24" deep and 50" long.  I don't love either dimension.  The back 6-10" of the top really only get used for tool storage, which shouldn't be happening.  50" isn't really long enough to work on large assemblies, though I've been making it work.  The traditional Shaker bench is significantly deeper than I want, and I'd like to try out a tool well.  So my current thinking is to make a solid top about 18" deep, with a tool well behind that. I can always put spacers in the well if I need the extra space, and in the meantime it should stay useable.

Design Considerations

I built my current bench out of Douglas Fir and 3/4" plywood.  I like the Douglas Fir:  it's hard, it's stable, and it looks good.  The plywood I'm not such a fan of... it's stable and reliable, but I don't much like the look.  I'll probably stick to a frame of DF, probably in the form of 4x4.  I might just use 4x4 for the legs, and use either 2x stock for the rails:  that will depend on how much overkill I want to go with and what lumber I can find.

For the top, I'd like to go solid wood.  My current bench has a plywood top, and while it's OK, drilling dog holes really isn't practical with hand tools.  Since I'm planning on a tail vise, what I may do is make the front 3" or so out of some hardwood, maple or oak for preference.  I can cut square mortises in that before gluing it in place, and have a good way to deal with surface planing long boards.  Behind that, I'll almost certainly go with laminated softwood;  pine, more DF, or whatever's cheap and straight at the lumber yard.  Either way I'll want the top at least 3" thick, to provide a good grip for my holdfasts.  Alternatively, I may buy a prefab laminated top, if I can find one thick enough (or two at a good enough price).

I do intend to paint everything but the top and the leg that will likely be used as a vise:  the more photos I see, the more I realize I want some color in my shop.  I'm planning for white walls and ceiling to add light, so any color is going to have to come from the furniture.

Conclusion


None of this is settled, but at least the rough outlines should work well.  With luck, I'll be able to start on this project this summer.  Without... well, design work is good mental exercise, and maybe it'll help someone else who's trying to figure out what to do for a bench.

Saturday, November 22, 2014

My next bench will have an apron

I haven't written anything here in quite a while, but I haven't been completely out of the workshop.  I built a frame, which I'll write about sometime soon, practiced M&T joints (which make me want a G&T, but that's another issue...), and built some frame-and-panel cabinet doors for a friend.

That last one prompted this post.

Some of you will have read the post about my bench, and how I built it.  Well, when I built it, I really didn't have a good bench, so I didn't have a lot of experience with the process of actually, you know, using a tool bench, especially for hand-tool intensive work.  Over the past few years I've built some little boxes, a tool chest, a picture frame, and a few other small things.  Well, these cabinet doors are 52" long, which means they're 4" longer than the bench.  That's mostly fine.  Trimming them to length was fine, shooting them was easy, smoothing wasn't an issue.  And then I needed to groove them to take the panel.  I ran into two problems.

First, they're too long to work on on the benchtop.  Normally, I'd use a holdfast to clamp down a batten, bring up the planing stop at the end, and work away.  These are made of 1x2 dimensional lumber, so balancing them isn't an issue, and I've done it before.  But these are longer than the bench, and I just don't have the room to work on a piece that long.  That's fine, that's why I have a vise.

The second problem is that they're only 1 3/4" high.  I can clamp them in the vise, but they're long enough to flex when I start trying to use a combination plane on them.  So I spent 15 minutes drilling holes in the front edge of my bench.  It's about 3" thick, so there's plenty of space, but after the first inch and a half it's drilling into the edge of plywood.  I wound up being able to do the work, but it was a challenge.

This was my test set up, confirming that support from the bottom would be sufficient:


20141107_203451


I basically just put two long clamps from the front to the back, and propped the wood on those.  It worked, but the edges of the clamps are thin, and it looked like it would damage the wood.  I could have just clamped blocks to the front of the bench, I suppose, but that's a one-time solution that will take time to repeat.  Nonsense.  Here's what I wound up with.

20141109_124436

20141109_124448


Sorry about the color balance on that last one:  all the photos were taken with my phone, but that one caught the light weirdly.

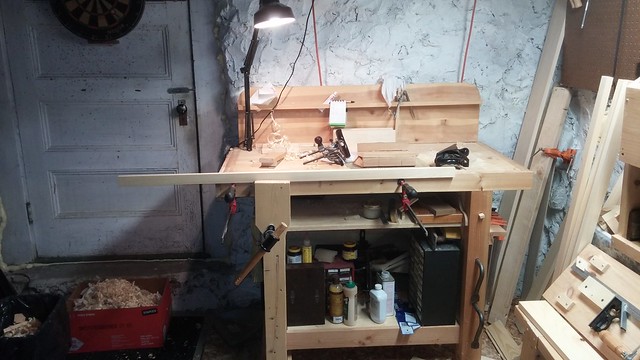
Anyway, you can see what I did:  drilled some holes, then more-or-less rounded the ends of some blocks, and padded them with 1/8" scrap to move the board up some.

In the end, it worked, but it would have been a lot easier if I had an apron with holes pre-drilled in it, so I could just clamp a support board on.  So that goes on the list for the next bench.

Wednesday, December 12, 2012

An inexpensive bench

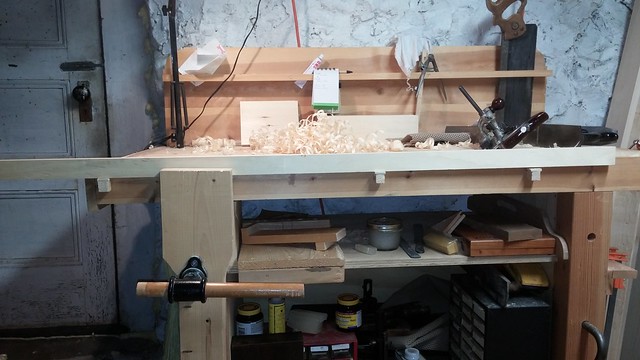
I know, there's a ton of these posts.  Every woodworker out there has written about their bench.  I'm going to write one anyway.  Here's a pretty picture to get you through the mounds of text you're about to see:


1) Design Criteria.

   I wanted a bench I could use indoors, since my usual shop is an unheated garage.  I knew I'd only be using hand tools (nothing powered), so I focused on that.  It was going in a small room that also had a few craft tables in it, so I needed to be able to pack everything up on it, and I wasn't going to be able to hang pegboard or cabinets, so tool storage was important.  So the final list ran:

   - Heavy!  I don't want it moving while I'm planing.
   - Not too big.  I originally wanted 2'x5', but wound up settling for about 2'x4'.
   - Good vise.  I wanted a heavy duty vise on the left end.
   - Decent storage space, with the option to use holdfasts once I get around to buying some.  (Meaning it needed to have 7" of space between the surface of the bench and the top shelf for the holdfasts I was looking at).
   - Cheap.  I don't have a lot of money to spend on this hobby, so price mattered.
   - Finally, it couldn't be ugly.  It was going in a living space, and guests and my girlfriend would see it on a regular basis.

   I finally settled on a modified version of a bench I saw in either Shopnotes or Woodsmith magazine;  the article was titled something like "Heirloom Workbench", and I could find it again if anyone wants to know where it came from.

2) Materials and cost.

  As best I can figure, the wood I used would have cost me about $110-120 if I'd bought it all specifically for the project.  However, I didn't;  quite a lot of it was scrap or leftovers from other projects.  I think I spent around $85 on new wood for this.  The fasteners were all things I had already;  mainly drywall screws and four "TimberLok" 6" fasteners.

  The legs are 4x4 Douglas Fir.  Two eight foot pieces covered it nicely, with some left over.  A twelve footer would have been more efficient (less waste), but there weren't any good ones and they're hard to transport anyway.  The shelves, sides, back (missing in the above photo), and top are all 3/4" cabinet grade plywood from a big box store.  I pretty much used up two full sheets, one for the top and one for the rest of the "box".  Trim and the tool rack are 1x pine, and the leg vise is 2x6 pine, as I recall... it might have started out 2x8, but I'm not sure.

  That brings me to the most expensive piece:  the vise screw.  Look, I could have gone cheap.  ShopFox and Jorgensen both have screws on Amazon for about $20-30.  But I wanted bulk.  I wanted a seriously heavy screw.  So I spent close to $80, and bought a screw from woodcraft.  It's an inch and a quarter across, and weighs a ton.  It's got something like three threads per inch, and you can crank it down hard enough to damage the wood of the vise.  That said, I probably would have been just fine with the $30 one from ShopFox... and I wouldn't have doubled the price of the bench to do it.  Oh well... lessons learned, I suppose, and I really don't regret it.

3)  Features and construction.

  As best I can figure, the bench weighs in at somewhere between 200 and 250 pounds.  3/4" ply weighs around 72 pounds per sheet, as best as I can find.  (If it were actually 3/4", it would probably weigh 75.  But it's not... it's just under.)  Douglas Fir is heavier than pine, which is one reason I chose it.  I also like the way it looks.  A foot of Douglas Fir 4x4 should weigh around 5-6 pounds, and I used something like twelve feet, and another four feet or so of DF 2x4.  Figure a total equivalent of fourteen feet at 5. pounds each (it's quite dry), and you get 77 pounds.  Another few pounds for the pine trim, and you get about 80 pounds of solid wood.  I'm guessing around 135 pounds for the plywood -- I didn't use all of it -- and the tool rack probably weighs in around 8-10 pounds.  So... without tools, about 225 pounds.  Not bad for a bench with two feet by four feet of workspace!  Placed on a rubber mat as it is, it's just not going to go anywhere.  It vibrates, certainly, and things in the tool rack tend to swing around, but it feels solid.

  Let's start with the easy part.  Each of the four legs has, essentially, a stopped rabbet in it on the inside corner.  The sides of the "box," the open area below the top shelf, fit into the rabbets and are fastened with drywall screws.  There's a gap above those 3/4", then another small piece to fill in above the top shelf.  The front and back rails, which form the edge of the bottom shelf, are made of Douglas Fir 2x4, and fitted to the legs with BIG mortises.  The mortises were started with a drill press, and finished, as I recall, with a 1" chisel.  The rails are glued and pegged, so they're not coming apart any time soon.  The back just kind of slots in between the top and bottom shelf... which is why it's missing from the picture.  The space is slightly larger than the panel, and it fell out while I was moving the bench.  Oops.  The rails are also rabbeted, end to end, to take the bottom shelf.  That shelf is basically a pressure fit -- it's constrained by the rabbets front and back, and the plywood sides on each end.

  Further holes in the legs:  I punched three through-holes in the right front leg.  Why?  Well, because then I can put pegs in to support longer pieces that I'm holding in the vise.  I've only wanted that once, but it worked well.  The holes are 3/4", so the holdfasts I'm planning on should also work with those holes.  On the left front leg, there's one big hole -- about 1 3/8" -- for the vise screw to pass through.  The nut for the screw is fastened to the back of the leg.  This is the one piece I'd change if I had the option.  It works, but it's clunky.  I'd be happier if I had bored a larger hole and mortised in the nut; it would look better and be easier to manage.  I may, eventually, jam a dowel or something in and redrill, but that's a project for another month.

  The top is four layers of 3/4" plywood, with two layers of pine banding around the edges.  The bottom three layers of ply are glued and screwed together, and the top fits in inside the banding, being held in place by that and the tool rack on the back.  In retrospect, I overcomplicated the whole process.  There are two sizes of plywood sheet (the bottom piece is 3/4" deeper and 1 1/2" wider), and the banding has two heights (the inside piece sits on top of the step created by the bottom sheet of ply, and the outer piece is just glued to the inner piece.  It works great -- it's unbelievable solid, even with the top piece not fastened on in any way -- but it was harder than it needed to be.  If I were doing it again, I'd cut all four pieces identically, and glue and  peg the banding onto the bottom three layers.

  So how did I attach the top, I hear you cry?  Well, that's where the TimberLok fasteners came in.  I drilled and countersunk pilot holes through the bottom three layers of ply, and drove the fasteners straight through into the legs.  Not, perhaps, quite as elegant as cutting mortises for the legs to fit into, but it was cheap, easy, quick, and I'd do it again in a heartbeat.  There's nearly an inch of wood between the bench top and the fasteners, so cutting into them and damaging a tool is unlikely, and they can be taken out and reused if I ever want to re-build the bench.

  Really, that's it.  The most complicated joinery is some stopped rabbets for the plywood.  Some pilot holes were drilled with a drill press, some were done with an eggbeater drill.  Almost all the screws were driven with a brace or a screwdriver, since my power driver died just before I started this project.

The Planing Stop:

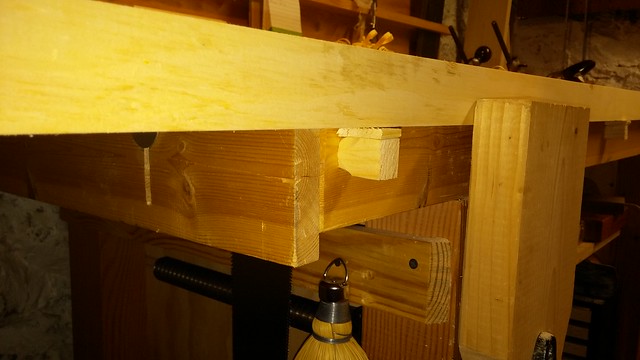
   You might see an odd piece of wood hanging off the left end in the photo above.  Here's a better shot:


That's a very simple planing stop.  It offers support from the front of the bench to the back, and can be adjusted to be as high or as low as I've ever wanted.  It's not perfect, but it was quick and easy.


The Vise:


  The vise is ridiculously simple.  It's just a slightly shaped chunk of 2x pine, with a vise screw through it a couple feet up.  That odd little bracket at the bottom deserves a closer look, though.  The problem with a leg vise is that it tends to tilt if the bottom isn't kept steady.  The traditional solution seems to be a straight piece, mortised into the bottom, that runs through a mortise in the leg.  That then has a bunch of holes drilled in it, and a pin is used to restrict how far it can move.  I went simpler.  I screwed a short piece of aluminum bar stock to the back of the front leg, and two pieces of 1x2 to the sides of the chop.  The 1x2 pieces have notches cut every 3/4", more or less, which act to prevent the bottom of the vise from moving when the screw is turned.  I've used it to hold stock less than 1/2" thick, and more than 8" thick.  Neither had problems, and I see no reason to believe that will change.  I did notice recently that it tends to bow a bit if I really crank down, but it still seems to hold perfectly well, so I'm not going to stress about it.

The Ends:

  Seeing as there was all this unused space at each end, I put a couple of racks on the bench.  At the right end it's just some 1x scrap, rabbeted and glued together into an L shape.  That was then screwed to the bench to hold clamps.  It works pretty well.


  At the other end, I screwed a single piece across, leg to leg, and put some nails in to hang two of my cheap saws from.  I'm also planning to add shaped hangers for a couple of nicer saws, but haven't yet, so those sit next to the bench instead.


Final Notes:

  Scroll way back to the beginning, to that first picture, then come back.  Done?  Good.  What you see in that shot is essentially my most-used tool set.  I have a toolbox that can hold everything that's sitting on the bench except the jointing plane (bottom shelf, on the right), and if I'm going somewhere where I know there'll be a bench and I may have time, I bring them.  The things that also travel with that aren't in that shot are:  
  - A two sided sharpening stone and a leather strop
  - A pile of auger bits for the brace, along with a hex adapter for it.
  - A cheapo (Ryobi) roll of drill bits and driver bits.
  - I generally replace the black-bladed Stanley FatMax saw with a nice old Diston, but sometimes both go with.
  - You can't see it, but there's a saw-sharpening file on the back of the worksurface.  That goes with too, although I don't really expect to use it.


  If I was doing this again, I'd pretty much make the same choices.  In the long run, I hope to add storage under the top shelf;  three drawers on one side, and a cabinet on the other, though I may go with just six drawers.  I might also go a bit cheaper on the screw.  In the end, that screw can put enough force on the chop that I fully expect it to break someday.  A cheaper one would likely have been entirely adequate, and brought the total cost under $150.  That said, I'll probably never be happy with a standard face vise again.  There's just too much benefit to the way the leg vise works for me.

  In any case, there you have it.  A nice bench for under $200, that could be brought under $150 by compromising on the screw.