Well, that's the category my toolbox falls under. When I was packing up to move, I decided to take some pictures of what goes into it. I missed a few things, but here's the basic rundown. Unfortunately, it's all still packed, and I can't easily dig things out, so some of the details may be wrong, but I'll be pretty close.
The box itself is an old Union brand tool box ("Tool Chest", according to the label) which my father's father used for storing hand saws. Some of those saws, once they've been restored and sharpened, will make their way back into it. It's just shy of three feet long, just long enough for my Disston rip saw, and if it was any bigger I might not be able to lift it when it was fully loaded.


The Contents
So what goes into it? Unfortunately, I'm not able to give you a tool-by tool photo shoot. Things go in pretty much as they fit, but I shot by categories. So here's what we've got, roughly bottom to top.
Saws

I fit four saws in here. The top three in the photo fit into the holder in the lid of the box. From the top of the photo down, they are:
1) A Craftsman "Kromedge" cross-cut saw. It's 8TPI, and it was indifferently sharpened by a professional with a sharpening machine last summer. I'll be re-sharpening it by hand, and probably reducing the set, too. This one was my father's, and may be the one of the reasons I thought I hated hand saws until I'd worked with a newly sharpened saw. It's better now, but it needs more work.
2) An old Disston. It's about 5 1/2TPI, filed rip, and it's the first saw I did a restoration on, and the first saw I filed. It cuts beautifully, and convinced me that hand tools are worth using.
3) A Shark brand Ryoba. This is a travesty of a tool. Machine stamped. Machine filed. Impulse hardened teeth. Plastic grip, with plastic pegs holding the blade in. And yet... I can't work without it. It cuts so smoothly I sometimes don't need to plane or sand. It's quick, it's reliable, and I can split a line the width of a two by four in seconds. I've used it for cutting dovetails in pine and ripping oak. You might have guessed by now that I'm a little conflicted about this saw, but it's earned its place in my tool box.
4) A gent's saw. I don't even know the brand... as far as I can tell, the brand name is "Professional Quality", which seems like cheating to me. It needs sharpening, but it's not bad. I paid about $15 for it, and it works for small cuts in soft wood. This one gets tucked in the side of the box wherever it will fit without the teeth hitting anything metal.
Hand Planes & Chisels

The second is a Millers Falls #85. I use it for everything. It works remarkably well for thinning stock, and of course it's a decent rabbet plane. There's no depth gauge on it -- it was lost long before I got the thing -- but I can live with that. That's what a marking gauge is for.
The last is a Craftsman block plane, and I have sort of a hate/hate relationship with it. I keep it because my father gave it to me, and there are times when nothing else will fit. But it's got no lateral adjustment at all, and the depth adjustment is so coarse as to be of questionable value. Hopefully someday I'll get a better one, and this one can retire to a shelf in the shop.
These are the chisels I use most often, ranging from 1" down to 1/4". They travel rolled up that piece of suede to protect both them and everything around them. I flop the edge up over the blades, roll it so they can't touch, and then fold the other edge over the whole thing. Takes about two seconds, and when I get around to sewing pockets in I'll already know where to put them. The chisel roll goes in the top of the case, more for spacing than any belief that I'll need chisels more often than planes.
Drills and bits

The brace was made by Craftsman, and while the ratchet works beautifully, there's just no way to get it to grip a round drill bit. It will hold just long enough to get the bit about 1/8" into the wood, then let it start to turn. But it works like a charm when fitted with an old tapered square shank bit (which I have, I just forgot to get them in the picture), and the hex adapter in the picture lets it drive screws like you wouldn't believe.
The eggbeater, on the other hand, works great, and grips a round-shanked drill bit just fine. It'll drill up to a quarter inch, and above that I have either an auger bit or an electric drill.
These generally both go as near the top of the box as I can get them, since I want them more often than any other tool except a tape measure.
Marking and Measuring

The six inch try square was cheap at a flea market, and almost square. I committed a mortal sin by filing it square, and now it's perfect.
The Empire brand bevel was a complete waste of money, but it's the only one I have, so I use it. Someday I'll find a better one. The Empire brand combination square, on the other hand, was a happy surprise: it was cheap, and it's accurate. I have no idea how that happened, and I check it regularly to make sure it's staying accurate, but it's good to within the limits of my ability to test, which means it's well within the tolerances of my work.
The marking gauges... wow. Opposite ends of the scale, here. One is a Veritas gauge, and is as good as you'd expect. The other is a Harbor Freight mortise gauge, and is... well, about as good as you'd expect. Maybe a bit better. Filing the pins helped, and I'm learning to make better use of it, but it'll never be my favorite tool.
The last tool here is just a metal rule, marked in metric and imperial, with a cork backing. It's occasionally useful, and so small and light I just toss it in for lack of a better place to store it.
Miscellaneous

These are not glamorous tools. The hammer is ancient, and fits my hand perfectly. I wouldn't want to use it for driving heavy construction nails, but for anything I'm likely to work with using these tools, it's great. The mallet... is a Harbor Freight panel mallet. I use it for tapping chisels, adjusting planes, and generally hitting things I don't want to hit with metal. It works, and it was so cheap I won't care when it breaks.
The screwdriver, coping saw, and level are all Home Depot specials... cheap and functional, but not very good. Actually, that's not true: the screwdriver is as good (and as bad) as any other mid-range screwdriver, and has four bits and two hex drivers. The level is accurate, light, and has a magnet in one side and a V-shaped trough in the other, so it will stick to or balance on just about anything. The coping saw pretty much sucks, though.
The spokeshave... well, I don't know whether the problem is it, or me, but it's not very good. I'm betting on a combination of the two.
Do I really need to say anything about the notebook?
Sharpening
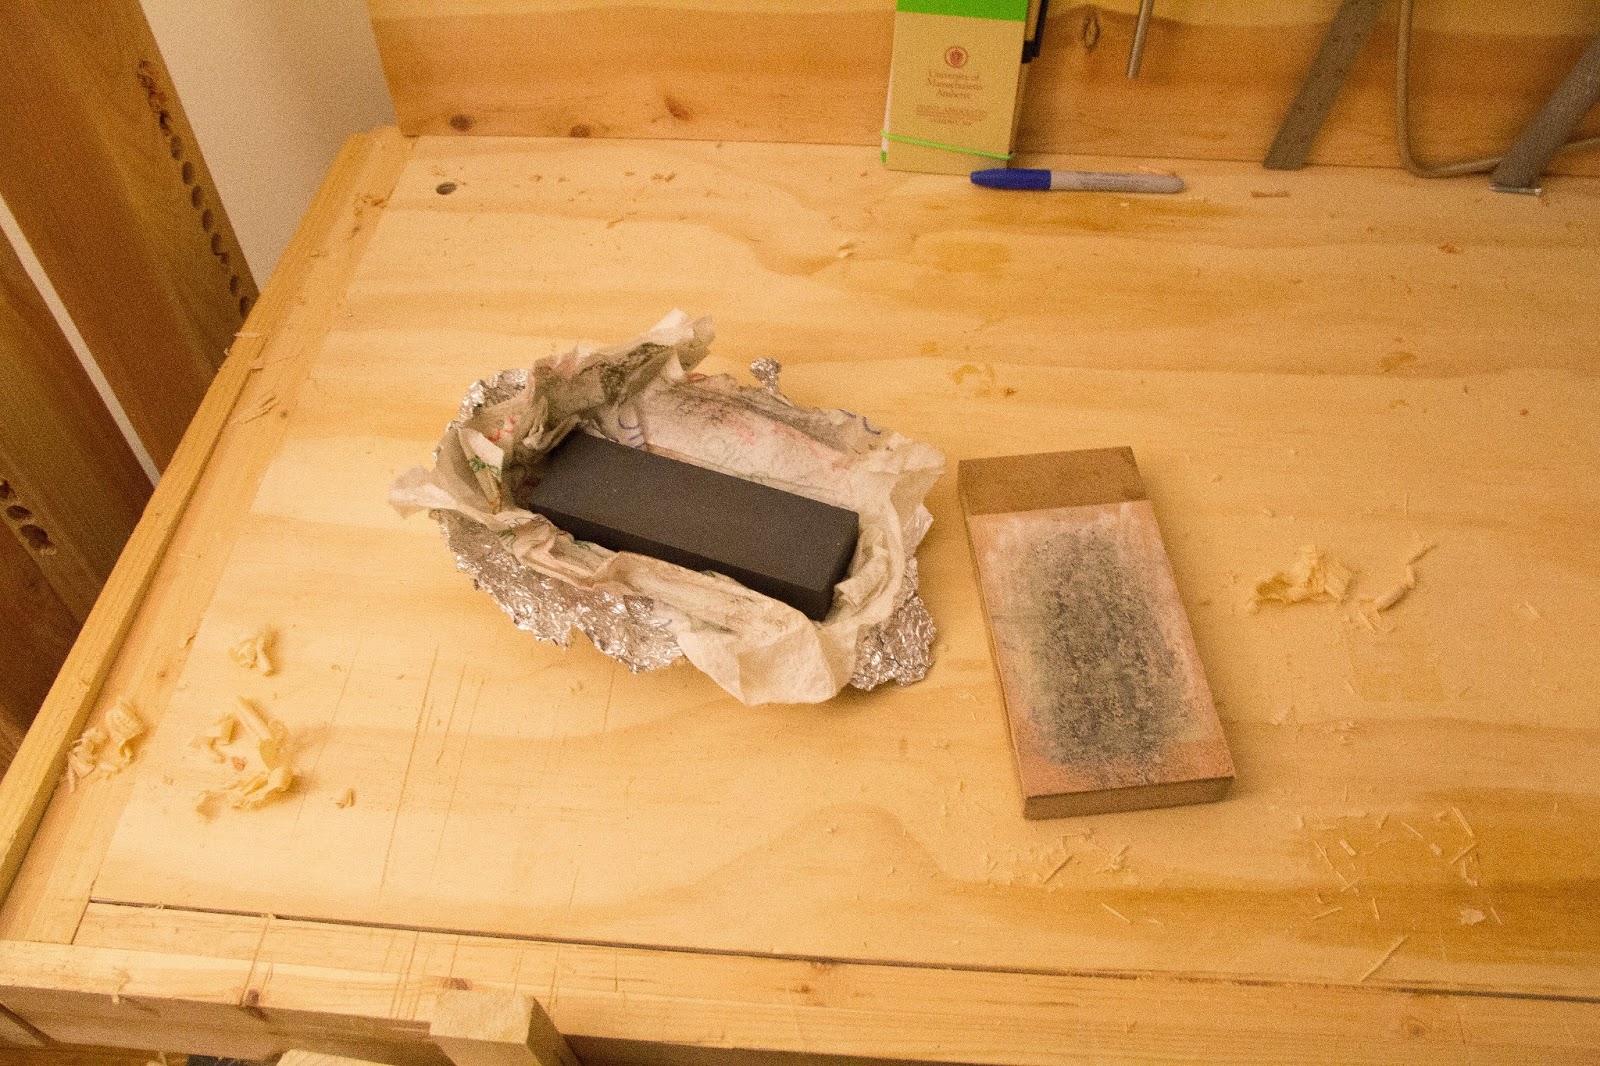
These days I'm mostly using a set of DMT diamond plates for sharpening in the shop, but the stone is more portable. The paper towel holds some mineral oil, and the foil keeps it off everything else. I've found that between the stone (it's coarse on one side, fine on the other, and was made by Brookstone so long ago that they no longer admit to having manufactured it) and the strop, I can put a pretty good edge on a chisel or plane iron.
Apron Tools

This is my embarrassment of a shop apron, and the tools that live in it. As you can see, I shot this picture as I was finishing up a project, and hadn't cleaned the rasp off yet. Oops. All simple stuff, here: the mechanical pencil was cheap and will be easy to replace when I break or lose it. The 4-in-1 rasp was likewise cheap, and I pay for that every time I use it. It's not bad enough to throw away yet, though. The Stanley knife is completely standard.
The square... well, that's a little weird. It IS square, but the markings are inches on one edge and centimeters on the other, and it's kind of annoying to have to remember which edge I'm looking at. It was free, though, and I like having a square I can drop in my apron pocket (the bigger one is 16" -- a little long for a pocket!). The tape I picked up for $1 at a flea market, and it's marked only in inches. No feet, no highlighting for stud distances, just inches and fractions of inches, down to eighths. Oddly, it matches my other rulers and tapes at 6" and 12", but not at 8". I have no idea why. There are a few other marks that aren't quite right, but as long as I use just this tape throughout, it doesn't really matter.
The apron is tiny, and started out life as a tool to hold roofing nails. It works great.
So there you have it. That's (almost) everything I put in my tool box when I want to travel and might want to do some carpentry-type woodworking. You can see in the final picture that I manage to squeeze a few 16" clamps in, but that's about all there's space for. And as for weight... I can't actually use the handle to lift the box: the whole top bows, and I'm afraid the handle may break. Maybe I need a second box, or a real portable chest....
So there you have it. That's (almost) everything I put in my tool box when I want to travel and might want to do some carpentry-type woodworking. You can see in the final picture that I manage to squeeze a few 16" clamps in, but that's about all there's space for. And as for weight... I can't actually use the handle to lift the box: the whole top bows, and I'm afraid the handle may break. Maybe I need a second box, or a real portable chest....

No comments:
Post a Comment