Friday, March 19, 2021

Some light reading

 I've seen a number of people ask recently what books they should look into if they're interested in woodworking, particularly without power tools.  I realized I'd never actually done a post on that, so here it is.

This is NOT a list of the best hand tool books out there.  I haven't read them all, and I may be missing something fantastic.  This is a list of some books I've found helpful, and some of why I thought they were worth recommending.  So, in no particular order:


- The Anarchist's Toolchest, by Christopher Schwarz.  This is an excellent book on theory and history, with excellent explanations of all the tools in an idealized English toolchest, and their use.  The toolchest is there, with full instructions, but isn't a great first project.  The rest of the trilogy, The Anarchist's Design Book and The Anarchist's Workbench, are also fantastic, and arguably more useful for a real beginner.

- Working Wood 1 & 2, by Paul Sellers.  This is a much better "getting started" book than the Anarchist trilogy.  It has a good section on tools, a number of starting projects with good explanation and photos, and an appendix on sharpening and tool care.  If I had to recommend just one book, it probably would end up being this one.

- The New Traditional Woodworker, by Jim Tolpin.  I've already reviewed this, here.  Since you already have that link, I'll just say it's a good book, and worth your time.

- The Essential Woodworker, by Robert Wearing.  This hasn't been one of my favorites, since I found the other three first.  That said, it's good enough that I'll recommend it.  It's now in print through Lost Art Press, and worth the purchase price.  It starts out very basic, then walks through building a few things, ranging from simple to complex.

- The Joiner and Cabinet Maker, by Anonymous, Christopher Schwarz and Joel Moskowitz.  This one is a little strange.  It started out as a short book in 1839, disappeared for quite a while, and was eventually found by Schwarz and Moskowitz.  The original book included discussion on how to get ahead in your trade, why you might be interested in woodworking, and basic operations.  It also included three projects:  a packing crate, a box for school books and lunch, and a chest of drawers.  Schwarz and Moskowitz added a preface on what the trades and trade unions in England looked like at the time, footnotes with explanation or expansion in the original text, and a section walking through actually building the projects in the book.  It's not exactly a how-to book, but there's a lot of good advice and explanation in it.  And, if nothing else, it's a good read!  (Also the audio book version was read by Roy Underhill, and although I haven't listened to it it's bound to be fantastic.)


So there you have it: my top choices for introductory woodworking books.  Give them a read, and let me know if you like them!

Wednesday, March 10, 2021

A minimal tool list

I've seen a lot of people recently asking what the minimal set of tools is, because they don't have a lot of money or space.  I've decided that that's probably something I'll be asked often enough that it's worth writing it up here.  This isn't exhaustive, and doesn't cover some of the weird tools you'll need for weird projects, but you should be able to make simple furniture with this list.  Be warned, I have a number of somewhat heretical opinions.

Measuring and Marking:

   - Pencils are useful.  Keep some handy.

   - Marking knife.  This doesn't need to be complicated or expensive.  It just has to have a relatively small blade (so it can fit into dovetails) and a sharp edge.  Don't over think it.

   - Small square:  I use a 6" Empire combination square for most things.  It fits in the pocket of my shop apron, which is nice.

   - Large square:  I mostly use a 16" Empire combination square.  If I'm working on something really big, I use either a framing square or a large wooden square I built.

   - Marking gauge.  Cheap, expensive, traditional wood, machined metal... you need something to make marks with.  I have a Veritas wheel marking gauge and a Harbor Freight mortise gauge.  Both work, and both get used. 


Cutting tools with teeth:  

   - If you're committed to a small kit, start with a ryoba (a Japanese style double sided pull saw).  With a little practice it's good for long rip cuts, any kind of cross cuts, and decent for dovetails.  You could stop there, but I don't recommend it.

   - Get a good fine tooth crosscut saw.  I use my Veritas carcass saw for almost everything, and it's enough nicer for things like dovetails that I'd add it to the Ryoba without a second thought.

   - I personally prefer Western saws:  I have a 5 1/2 TPI rip saw and a roughly 7TPI crosscut.  I used a ryoba for a long time, though, and I still use it occasionally.
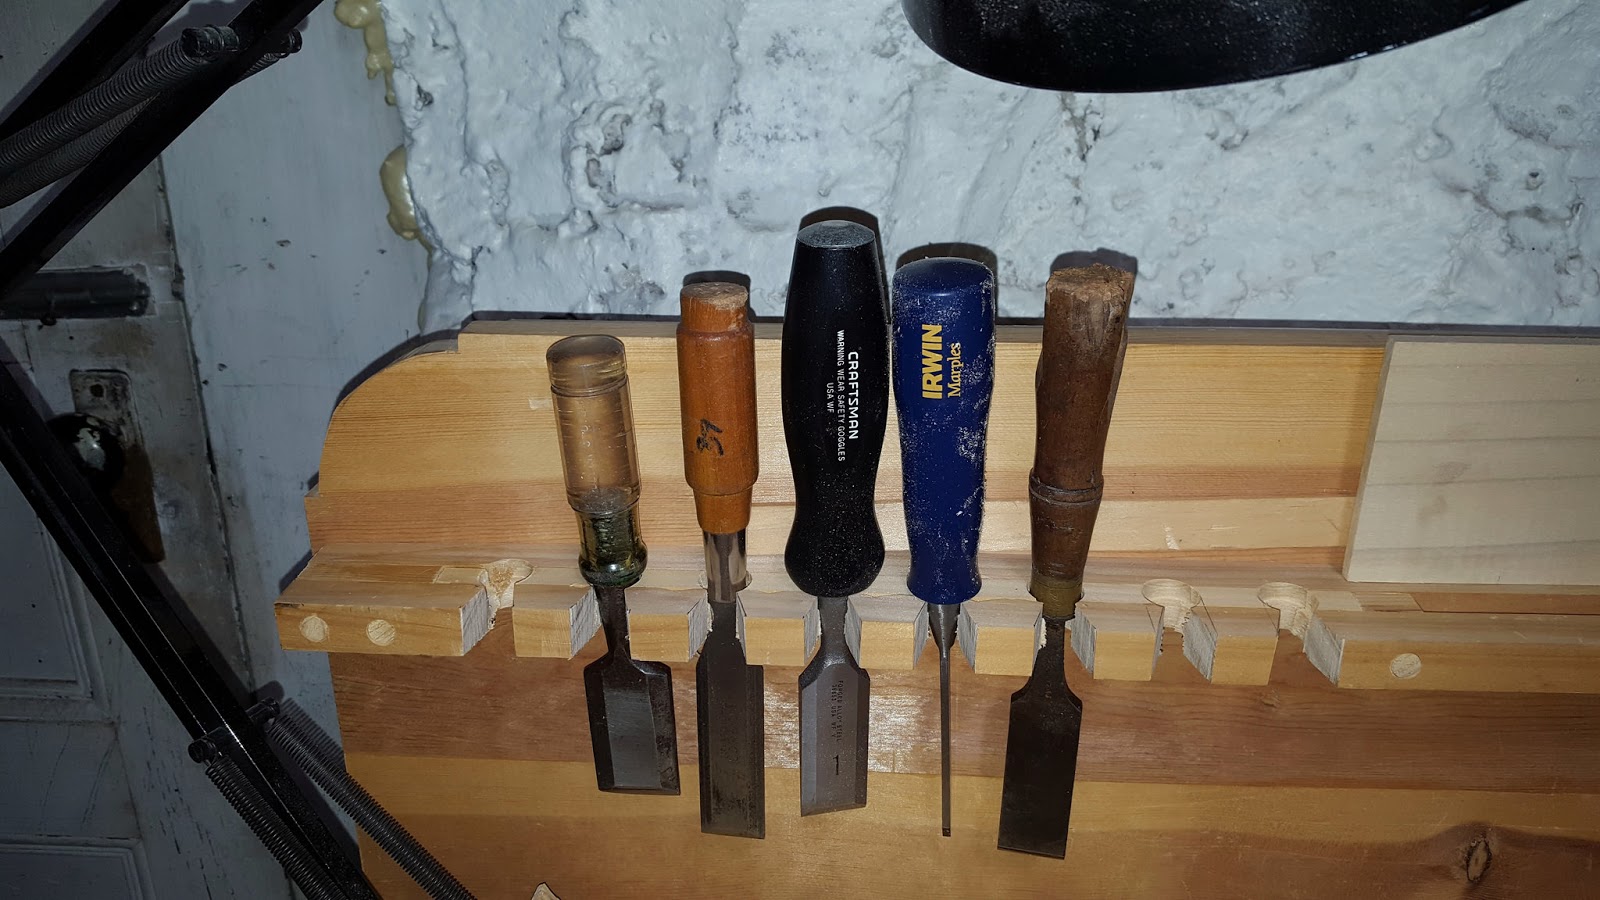

Chisels:

   - Get decent chisels in 1/4", 3/4", and 1".  You'll want to expand later, but those will do most of what you want.  You can use regular bench chisels for cutting mortises, too, so you really can just stop there.


Whacking things.  You need two hammer-sort-of-things.

   - A thing for driving nails.  For furniture scale projects, I like a 12-oz hammer with a wooden handle.  Your preference my vary.

   - A thing for hitting chisels and making recalcitrant joints fit.  I recently switched from a mallet to a 2.5lb engineer's hammer, and I don't ever intend to go back.  Again, your preference may vary.


Hand Planes.  This is where preference really starts to come in.  These are my choices, and other people will disagree.  In order of importantance, and don't forget I'm a heretic:

   - A jointer/try plane.  Why?  Because store-bought lumber isn't straight.  You can smooth the surface with a sanding block or a palm sander, you can remove stock with a saw, but if you can't get the edge straight nothing else matters.

   - A smoothing plane.  I like a #3 or #4, depending on what I'm doing.  Get a #4 (or equivalent), learn to sharpen it, and use it.  If you want more later, go for it.

   - A jack plane.  I like a #5, which, oddly, seems to be the standard choice.  This is for removing stock, which you'll need to do eventually.

   - A rabbet plane.  #78, shoulder plane, straight rabbet, whatever:  you need a way to make rabbets, and this is the best quick, reliable method.

   - This is the weird one:  I think you need a plow plane, or some sort of equivalent.  You're going to want to cut grooves sooner or later, and a plow is the best way to do that.  I have several, and the cheap Mujingfang I got for $35 works OK.  I prefer a grooving plane if I have one in the right size, or a 45-equivalent if I don't.


Drills:

   - In all honesty, I'd start with a decent battery powered drill and a good set of bits.  I have a brace and bits, and an egg-beater drill, and they're fantastic, but I use an electric drill for almost everything.

   - Gimlets.  They're small, they're cheap, and they're the best tool I've ever found for drilling holes for screws.  Garret Wade has a decent set for a good price.


Sanding supplies:  Get an assortment of paper and a nice sanding block.  A powered sander is a nice thing to have too.


Sharpening supplies.  Here's where I just kind of have to wave my hands and say "good luck."  My personal preference is DMT Duosharp 3"x8" plates, plus a strop.  A lot of people prefer oilstones, sandpaper, or waterstones.  They're not wrong, and neither am I.  I also prefer sharpening without a jig, a preference I picked up from Paul Sellers at a presentation.  I do like a jig if I'm completely changing the bevel, though.  So... uh... good luck!


Other Stuff.

   - Glue.  I have a very strong preference for hide glue anywhere it's reasonable.  If it's for a kitchen or bath, I use Titebond 3.  For anything else, I go for Old Brown Glue.  Be aware that it has a limited shelf life, and buy it in smaller containers unless you know you've got a big project coming up.

   - Screws.  Buy them as you need them, but buy extra.  If you needed that size once, you're going to need it again.

   - Nails.  I'm a big fan of square nails from the Tremont Nail Co.  Again, buy them as you need them, and buy extra.


Big Stuff.

   - You're going to need a way to store your tools.  My choice is a "Dutch" tool chest.  I store everything on this list but the nails and screws, plus quite a lot more, in mine, and there's room to spare.  Make it to fit your tools:  mine is about 32" long because that's what I needed to fit my longest saw.  It's around 30" high at the highest, I think, and made from 1x12, so it's about 12.5" deep counting the front and back panels.

   - A bench is important.  You can look at the one I posted here, but there are endless good designs.  Make sure it has a good vise on the front, and holes for holdfasts.


Expensive (or rare) stuff.  These are some of the "nice to have" tools that are in my shop.

   - Hollow chisel mortiser.  Good LORD did this make my life easier.

   - Match planes.  These are a pair of planes designed to cut a matched tongue and groove, and they're the best hand tools every made.  I use mine for cutting grooves for drawer bottoms, too.  Honestly, these are probably higher on my list than the mortiser.

   - Band Saw.  Being able to easily cut curves is nice.  So is being able to make (mostly) straight cuts to rip a very narrow piece off.

   - Drill press.  Another one that's nice to have.  This is the first big power tool I had, and probably the least valuable to me.  It is pretty nice to have, though.


Books.  There are a vast number of woodworking books.  Here are a few I think are pretty good, in random order.

   - "Working Wood 1&2", Paul Sellers.  Watch his videos, too!

   - The "Anarchist" series from Christopher Schwarz.  "The Anarchist's Toolchest" is the first, and probably the most useful.

   - "The New Traditional Woodworker," by Jim Tolpin.

Thursday, February 16, 2017

Workshop Maintenance

I've spent some evenings and weekends working on a toddler bed frame for some friends recently (post to follow, sooner or later), and reached a point where I need to wait for someone else to finish their part.  This past weekend I built an English layout square, mostly for practice:  it's got legs somewhere around 22" long, which is bigger than is really useful in my tiny shop.  I hope to post an article about that either tomorrow or Monday.

But once that was done, I looked around and realized I'd been neglecting my tools recently.  Oh, I do a quick touchup with a strop while I'm working, but a few of my planes weren't cutting well anymore.  Last night I started working on getting everything back into top shape.  A lot of people seem to dislike sharpening, which I can understand:  it's a lot of time and effort that could otherwise be spent working on wood.  I still enjoy it, though, because every time I sharpen my tools, I get a better edge than I did the time before.

Last night I went over the cutters for my #3, #4, #5, and one of my block planes.  The block plane is low angle, and was a particular triumph, since it never cut right to begin with.  I finally got out some coarse sandpaper and and a honing jig, and re-ground the bevel.  Finally, it works well enough to get a good cut across end grain.

Next up are chisels:   none of them are as sharp as they could be, and a few of them I've never actually sharpened, since I haven't needed something that width.  Once those are done, I may tackle my dovetail saw:  it's gotten dull enough that I don't really use it, which means it's time to fix it up.

Tuesday, December 13, 2016

Workbench Modifications

I haven't been writing much, because I've been occupied on other things, like a piece of furniture I'm making for a friend.  Unfortunately, I screwed that up completely, and can't work on it again until I get more lumber.

On the plus side, that means I can spend some time working in the shop on my projects again!

The first change I needed to make was to my tool rack.


As you can see if you look closely, the original tool rack is great for some things, but leaves chisels free to fall over any time I bump the bench, or hit something on it with a mallet.  I haven't actually nicked an edge yet, but it's only a matter of time.  Since I've wanted to try out a standard chisel rack for a while, this seemed like a good opportunity.

I started by gluing a new piece in to close the gap.  As I was doing it, I realized that the whole process was going to end up leaving it really fragile, but it should last long enough to let me decide whether I like it or not.


I wanted to use my bench for something else while the glue dried, so I left it pegged to the back of the bench, wrapped twine around it tightly, and held the end of the string with a spring clamp.  It worked quite well, and was tight enough that I had some squeeze-out, despite the filler piece not being a particularly tight fit.

While that was drying I sharpened one of the chisels that had been on the rack, cleaned, sharpened and reassembled a low angle block plane I'd been putting off working on, and started working on a saw rack for behind the back panel.

Once the glue was dry, I removed the whole rack from the back panel, then drilled 3/4" counterbores about a quarter of an inch deep, then smaller holes all the way through.  Cutting notches for the chisels to slide in was tricky, because the second cut on each slot was cutting through an unsupported and fairly narrow pillar with two questionable glue joints.  A great deal of care and a very light hand with the saw got me through it, though, and I was able to put the rack back on.


As you can see, it worked fairly well.  Those five chisels don't actually fit in my tool chest (I didn't leave much space for extra chisels when I built it), so I'm pleased that they've finally got a storage rack that will keep them reasonably safe.  At some point I'll need to remove that end of the rack entirely and redo it correctly (that is, using a solid block of wood instead of gluing up layers.

The saw rack behind is even simpler:  I cut a piece of 1/2" poplar to length, and glued some spacers to it before screwing the assembly to the back of the panel.  I'll try to get some pictures of the whole setup in use tonight.

Wednesday, September 21, 2016

What have I been up to?

I obviously haven't been writing much here, but I have still been getting in some workshop time.  Here are a few of the things I've been occupied with.

1) Combination plane storage!  I bought a new combination plane; I found a deal I couldn't turn down, and it turns out I like it a lot more than the other one I had.  My one complaint is that the cutters came stored in a canvas roll, which is great, but not actually big enough.  I may end up buying some canvas and making a larger roll, but for the moment I'm building some storage boxes in the style of the old Stanley combination plane storage.  Here's the first one done:


After making it, I realized that Stanley didn't actually put dividers in.  I think probably I'm going to go that route as well, since the dividers vastly increased the amount of time this took.  Also, I really should be putting the cutters in with their edge up.  Just at the moment, they're not actually sharper at the other end, so it's a minimal concern.

2) Experimenting with splines.  I'd never actually made a box with splined corners before, and I wanted to try it.  I don't actually have a "finished" photo, but here's one from along the way.


The splines are cheap veneer of some sort, the sides are poplar, and the top and bottom were pine, all chosen because they were what I had.  Fortunately, it turns out that my dovetail saw leaves a kerf only slightly wider than the veneer is thick, so I can cut a slot and then glue in the veneer.

I screwed up the hinges, so I'll need to go back and try that again, but I'm pretty pleased.

3) Buying and playing with moulding planes!  While I was out of the shop injured this summer, I wound up finding a bunch of inexpensive moulding planes on Etsy, and a few more at antique stores.  I also went out this weekend and bought four more from Craigslist.  At the moment, I'm averaging about $20 each for the moulding planes, and they've been in fantastic condition.  A couple of them could use some wedge tweaking, but aside from that all of them are entirely useable.


Looking a little more closely, we have:


 The first four are the ones I bought a few days ago.  Left to right, there is a matched tongue and groove set, a beading plane, and a #2 hollow, which is remarkably straight.  The grooving plane needs some work on the wedge... it was clearly added by someone who was using the plane for decoration, and doesn't fit very well.  On a side note, I could with that everyone who bought these things for decoration took care of them this well!  The guy I bought them from said he'd "refinished them", which seems to mean he sanded lightly and then put on a couple coats of BLO.  They look a lot newer than the rest, but are probably of similar vintage:  the match planes were made by the Ohio Tool Company, the beading plane is by Sandusky, and the hollow has no legible maker's mark.

The next two I picked up at an antique store.  The hollow is in good shape, and cuts fairly well, although the back of the cutter could use some polishing, and the grooving plane has lost its mate.  Sadly, it doesn't match the other set, so I suppose I'll have to build it a match.


The two on the far left here both came from other antique stores.  One is another bead, which I believe started its life as a reeding plane.  At some point one of the boxwood inserts was broken, and someone planed what was left flat and nailed a fence to the body.  Now that I have a couple of beading planes, I may try to restore that.  The other is a dado plane in terrible shape.  It's missing the front wedge, the depth stop isn't straight, and there's something weird about the way the (skewed) cutter was ground.  I mostly bought it because I'd never seen a dado plane in person, and figured it would make a reasonable pattern even if I didn't ever get around to fixing it up.

The next four all came from Etsy.  There are two profile moulding planes, another beading plane, and a very neat moving fillister plane.  The nicker needs some work, but everything else works perfectly.  I may actually do a short post about that one sometime... it's got some features that seem to be a little unusual.


You can see the depth stop on the moving fillister a little bit, here: it's a rounded, moderately decorative piece that's held in place by screws at the front and back.  Getting it even is a little fiddly, but once you lock it down it's fantastic.

After that are three new planes.  Two of them are a Mujingfang hollow and round, which are neat, but don't fit my hands as well as I'd like.  They were a gift, and they are occasionally useful, so they get to stay on the shelf.  After that is a no-name plane that's basically a 7/8" straight rabbet.  It needed some tuning, and shavings tend to get jammed in it as you work, but with a little practice it has turned out to be quite useful.  I love it for making things like pencil boxes:  it's a lot lighter than a Stanley 78, and doesn't require any setup.

The last one on the shelf is a 2" wide skewed rabbet that I inherited from my father's father.  It's dented, heavily checked, and the sole was beaten up and about 3 degrees off square when I got it.  The iron could use a little more work, but I flattened and squared the sole, removed the worst of the rust from the iron, and it now works quite well, at least for rough work.  The mouth is pretty wide, and I haven't had the motivation to make an insert for it yet, so it's not great for fine work.  For a wide rebate, though, it'll remove a vast amount of waste very quickly.  I think I had it removing about 1/16" on a stroke when I was testing it, which is pretty absurd.


So that's what I've been up to.  How about you?


Thursday, August 18, 2016

A few of my favorite (wood working) books and videos

There are a lot of woodworking books out there:  some are good, some are bad, and some are just weird.  Last week, someone asked me what books I'd recommend, and I had to stop to think about it.

After consideration, here are some of my favorites.  This list isn't anything near exhaustive, nor am I making any claim that everyone who wants to be a woodworker should read them.  They're just what comes to mind when I think about what books have been valuable to me, in no particular order.

1) The New Traditional Woodworker, by Jim Tolpin.  For my full review, click here.  Jim Tolpin looks a lot at how to set up a functional workflow, and what tools are necessary if you're going to use all (or mostly) hand tools, and includes directions on how to make some basic jigs and tools you'll want.  This one is fairly easy to find, and an excellent starting point.

2) The Anarchist's Toolchest, by Christopher Schwarz.  For my full review, click here.  I'm always a little leery of recommending this one, despite how much I like it.  Chris has a weird sense of humor, and a philosophy that's a little unusual.  That said, I really like his theories on tools and tool use, and I think there's quite a lot of value in the book overall.  His tool list gives not only what he recommends, but why, which I found very helpful.  Overall, I think he gives a pretty good basis for hand tool work.

3) Working Wood 1 & 2: the Artisan Course with Paul Sellers, by Paul Sellers.  Paul Sellers was the first person I got to watch doing hand work in person, which left me with a soft spot for his teaching style.  The book walks through basic tools, and then starts working on projects (a spoon, a stool, a dovetailed box, and a few other things), covering the three basic joints, what tools to use, and so on.  He definitely has an anti-machine bent that comes through in the book, but there's more than enough good information in the book to be worth reading past that.  I also strongly recommend watching his videos, which are mostly available on YouTube.  He mostly does a very good job of explaining what he's doing, and they're fairly short.

4) The Joiner & Cabinetmaker, By Anonymous, Christopher Schwarz and Joel Moskowitz.  This is a good look at what woodworking was like before the era of common powertools.  There were mills to produce boards, powered by water or steam, but an individual shop wasn't likely to have anything powered on hand.  The book walks you through the work of an apprentice in a good joiner's shop, and talks about tools, their use, and habits that a good woodworker should get into if they want to be successful.  Later in the book, Schwarz goes through each of the projects presented in the original text, which is also quite useful.

5) Anything by Roy Underhill.  I love his writing style, and while he's frequently short on details, there's enough information to figure out what he's doing.  I think his videos are stronger, and some of the more recent seasons are available through the PBS website (http://pbs.org/woodwrightsshop).  He also teaches classes, if you're lucky enough to live near him.  The Woodwright's Apprentice is probably the book of his I appreciate the most, but everything I've read has been worth the time.

6) Woodworking Forums.  There are a lot of good forums out there, and even if you never log in to ask a question, you'll learn a lot from reading them.  At the moment I mostly visit WoodworkingTalk.com, LumberJocks.com, and SawmillCreek.org.  And if you have specific questions, there are always people with answers on those forums.

As I said, this is nowhere near an exhaustive list.  It's really just my first reactions when someone asks me what to read.  They've been helpful to me, though, so they may also be of use to you.

There's one key thing to remember, though:  Nobody has all the answers.  Woodworking is, in many ways, an idiosyncratic hobby, and different people will find that different techniques work for them.  If you don't like the way one author has you cutting dovetails, find another author.


Search Result

s

Tuesday, August 2, 2016

How you work determines how you think.

We've all heard it:  "When all you have is a hammer, everything looks like a nail."  It's sort of true, though.  One thing I've realized as I worked more with hand tools, and which I've mentioned before, is that a lot of things are simpler.  Not necessarily easier, but simpler.

I was just reading someone's blog posts about making a "Milkman's Bench", and they were talking about needing to be sure the grooves they milled for the tail vise were exactly 1/2".  "Why?", I thought.  "Just cut the tenons on the moving part once you've done the grooves, and the exact size won't matter at all!"  Except that's harder with power tools.  If you're cutting your tenon with a dado stack, you need to know exactly how high to set the blade, or you'll run into trouble.

In a different post, they were thickness planing to make sure that the pieces were exactly 1 5/8" thick.  "Why?", I asked myself again.  Well, because the parts are being made from a cut list.  If you're cutting everything from a list, then doing assembly, it's a lot easier to make sure everything is identical before you start doing assembly.  In non-machine work, it's kind of irrelevant what the actual size of any of the parts is, because it's trivial to just size each piece to fit the one before.  Maybe you end up at 1 11/16", or 1 7/8", but it doesn't really matter.

For me, it's now easier to treat dimensions as a guideline, an ideal that I don't really need to achieve unless I'm building a piece of furniture to fit a specific space.  Other than that... So what if I'm a few sixteenths off? I'm going to plane everything flush when I'm done anyway.

Now, please don't get me wrong.  This isn't a condemnation of power tools, or a statement that people are in some way "wrong" for building to exact dimensions.  If you're using power tools, it really is a better/easier way to work.  I think a lot of hand tool workers would be baffled by the idea of cutting everything to exact tolerances, and the power tools folks would be baffled by our failure to measure anything precisely.  Neither way is better.

The point is that the tools we use determines how we think about things, and how we approach problems.