Showing posts with label CTR. Show all posts

Thursday, May 12, 2016

CTR 12: Mujingfang Rosewood Plough Plane

This is a review of Mujingfang's plough plane.  I'm going to start off by saying that if you can afford a more expensive option, something like the Veritas Small Plow, you should go with that instead.  But since that sells for $275 with 5 blades, and the Mujingfang sells for $66, they're not really competing in the same market.

If you're reading this and don't know what a plow plane is, it's a tool used to cut grooves in a piece of wood.  Think of the grooves in a frame and panel door, or the ones that hold the bottom of a drawer in place.  Normally they're used with the grain, although if you cut the edges of the groove with a knife or saw they can go across the grain.  Some (although not this one) have cutters ahead of the main iron to make them work better across the grain.

Where, and How Much?

I bought mine from Woodcraft, at this link here.  Full retail is $66 no matter where you buy it:  Amazon, Newegg, Woodcraft, wherever... it's always $66.  It's also always sold by Woodcraft, so there might be a connection there.

What do you get, and What's the Construction Like?

You get the body, fence, arms, and five blades, sized 1/8", 3/16", 1/4", 3/8" and 1/2". The sizes are actually Imperial sizes, not metric, so they should match your chisels if you're buying in the US.

Construction is decent, but not fantastic. It's a fairly simple tool: the body has a metal (presumably steel) skate set into it, and the wedge matches the throat quite well. Adjustment is simple, and the fence is reasonably stable.

There are, however, a few minor issues. The first is with the fence: The fence is held in place by what seems to be a serrated piece of metal, with a bolt through it. By tightening the wingnut, you pull that serrated piece of metal up, and it grips the arm. However, loosening the wing nut doesn't actually push it down... it just loosens the nut. A light tap with a mallet (or on the top of your workbench) loosens it fully, though, so it's a nuisance that you'll probably stop noticing fairly quickly.

The other issue, which is a bit more substantial, is with the skate. On the copy I bought, the front skate was ever so slightly too far back, and the back of the iron just barely touched it. Obviously that meant shavings couldn't escape, and so the plane didn't work at all. As soon as it started cutting it would jam. I fixed it with about two minutes of work with a file, rounding off the back corner of the front skate. That resolved the problem entirely. It's possible I just got a bad one, but it certainly indicates their quality control isn't perfect. You should be able to see the issue here. As I said, a little bit of careful work with a file cleared up the issue entirely. If you're planning to take very heavy cuts, you'll want to take off more of the skate, but I took off maybe 1/32" or a touch more, and that was plenty.


Other than that, it's pretty nice.  The irons fit well and mate with the rear skate quite well, the wedge fits, and the fence (once you've correctly loosened the screw) slides easily.  One thing I did notice is that the arms aren't quite parallel, so if you pull the fence all the way off you'll need to squeeze them together just a touch to get it back on.  Not a big deal, and it means the fence doesn't slide around when the nuts are loose.

 How does it work?

Overall, I'm reasonably pleased.  It's fairly easy to adjust, the fence appears to stay where it's put, and the irons seem to cut well.  One thing to be aware of is that the fence has no inclination to stay parallel on its own.  I recommend using a chisel or setup blocks to make sure you've got it set up correctly.

I would say that, overall, it's not quite as nice as the Sargent-made combination plane I have.  It does a better job of dealing with shavings (it spits them out the top, rather than forcing them out the side towards your hand), but it has no depth stop at all, adjustment is more difficult, and I suspect that the fence will eventually stop holding.

But it does do the job, and if you can't afford a modern combination or plow plane, and you don't have the time or ability to restore an old one, it's a pretty good choice.

Final Thoughts?

As I said, a modern or restored plow plane will do the job more easily and reliably.  But the Veritas Small Plow with five irons costs $275, while the Mujingfang version costs $66.  At a price difference of over $200, I'd go with the Mujingfang until I could find a decent used combination plane.  It does the job, looks like it will remain reliable, and is definitely cost efficient.

Would I buy another?

That's hard to answer.  If I had no plow plane at all, and needed one at a low price, then yes, I would.  Or if I needed one to use in conditions where it might be lost or damaged, then sure:  I'd rather lose this than an expensive one, and as I said, it does the job.

Friday, May 6, 2016

CTR 11: Mujingfang Rosewood 11" Jack Plane

This review is of a tool I really didn't expect to like, the Mujingfang 11" Jack Plane.  Based on their marketing information, Mujingfang basically went out and found people who were making decent tools locally, and brought them together in Hong Kong to make planes for the international market.  Is that true?  Who knows!  All I can do is review the tools.

Straight out of the box, no handlebars.

Where, and How Much?

I bought mine at WoodCraft, catching it on a 15% off sale.  The 11" Jack is usually priced at $51.00 everywhere I've seen it.

What do you get, and What's the construction like?

What you get is:
1) A plane body
2) A double iron (meaning an iron with a chipbreaker)
3) A wedge
4) A rod that's supposed to go through the body side to side.  It's not in the photo above, because I forgot about it when I was taking pictures.

Construction is remarkably good, given the cost.  The sole is flat to within the limits of my measurement, and the wedge is a pretty decent fit.  It could be better, but it's good enough.  The rod tapers slightly, so it only fits through one way, and sticks about halfway through.  I'll be honest... I'm not really sure what the value of the rod is.  It seems to make it slightly easier to grip when pulling, but that's about it, and I mostly don't pull a plane.  There is one oddity, which is in the iron.


You may be able to see, down near the sharp end, a line of bronze-colored metal.  The blade was made by welding a piece of A2 high speed steel (according to the advertisement) to a piece of softer metal.  It's not terribly unusual, and it's not bad, but it does look kind of strange.  The weld also wasn't cleaned up very well, and there are some "splatters" of something on the front of the blade.  They don't affect the function, so I'm not going to worry about them.

Fit is excellent, but finish is mixed.  The iron is well sharpened (shaving sharp, right out of the box in my case!) but shows marks from the grinder.  The surfaces where you'll handle the plane are smooth and cleanly finished, but the throat and wedge are fairly rough.  Again, none of it compromises the function of the plane, but it shows where corners were cut to save some money.  Since they clearly pass some of that savings on, I can't really complain.

 How does it work?

Very well.  To be honest, I'm quite surprised at how well it performed.  While I wasn't able to take a terribly thick shaving, which I'd like to be able to do with a jack, it's perfectly adequate for taking an edge from rough-cut to ready to finish.  I probably managed to get up around a 32nd in thickness before it clogged, so it's fine unless you're trying to reduce the width or thickness of a board substantially.  It's enough different from my metal planes that I'm going to assign most of my problems to inexperience:  I wasn't able to cut a perfectly square edge without a lot of care, and I also pretty thoroughly failed to make the edge straight.  Again, though, both of those are issues with the user, not the plane.

Here are the critical things:  The iron was sharp, adjusting it was relatively simple, and the wedge can be tapped in tight enough to keep the iron from shifting in a heavy cut while still backing out easily with some hammer taps at the heel.  Incidentally, don't use a metal hammer for that:  I use a cheap soft-face mallet I bought at Harbor Freight for hitting the heel or wedge, and a very light steel hammer to advance the iron.  Brass would probably better.

I tested it  in pine and red oak.  In both cases it left a smooth, clean surface.  I imagine it would work as well in just about any furniture wood.
Rough cut edge.
Finished edge.  (Ignore the face... I didn't touch that.)

Final Thoughts?

Absolutely worth it.  Learning to adjust a wooden plane can be an adventure, but this actually adjusts more easily than any other I've tried.  I'm actually considering buying the smoother, and putting these in a light-weight travelling tool kit.  It weighs dramatically less than the Stanley #5, although the blade is a bit narrower and the sole is a bit longer.

Would I buy another?

Absolutely.  I can recommend this one with a clear conscience.
Absolutely.

Monday, June 23, 2014

CTR 9: Mujingfang hollow and round, 1/4"

UPDATE:  Now there are photos!

As you should guess from the title, this is a review of some of the inexpensive hollow and round planes you can find at Lee Valley and other places.  Overall, my experience has been fairly positive:  in line with others in the CTR (Cheap Tool Review) line, I'll be fairly forgiving of minor problems.

One note:  I'm using "hollow" to mean the body with a concave sole, and "round" to mean the one with a convex sole.  I'm pretty sure that's right, but if it's not, at least you've had warning.

Where, and How Much?

The pair I got were a gift, and I'm not sure where they were purchased.  Lee Valley carries them (here), at $20 each, or $37 for the pair.  Prices increase as size does:  a set of 12 (six different sizes) is about $250.  Japan Woodworker also has them, although as I write this it looks like they only have two sizes in stock.

What do you get, and What's the Construction Like?

Each plane ships in a cardboard box containing the plane body, iron, and wedge.  In the case of my planes, the construction is reasonable.  The body is some kind of hard wood (the site claims a type of rosewood), and is well finished on the outside.  The inside of the mouth is rough, especially on the front:  the bedding surface is better, but still not polished smooth like the outside is.  That seems to be the philosophy behind these planes:  where your hand will touch it, or where it touches the work, make it perfect.  Everything else can go hang.

The wedge, in mine, fits well:  it slides into place easily, can be tapped tight fairly simply, and (mostly) directs shavings where they need to go.

The iron, similarly, is reasonably well shaped (better on the hollow than the round), but fairly rough everywhere except the final inch or so.  Since that's what's necessary for it to work, I don't really have a problem with that.

One final note:  these things are tiny.  Miniscule.  "Don't sneeze, they'll blow away with the shavings" small.  Lee Valley claims they're around six and a quarter inches long, which I might believe, but they seem smaller.


HR Planes with rule
Tiny, I tell you!

 How do they work?

I'm going to start with a disclaimer here:  these are the first hollow and round I've ever used.  In fact, rabbet and plow planes excluded, these are the first moulding planes I've ever used.  My review, therefore, is not informed from experience with dozens of planes.  It's based purely on the out of the box performance with no real expectations.

Next, a note on usage.  From what I've read, it's not really reasonable to just start cutting with a hollow or round.  A round should have enough of a rabbet cut that the iron makes contact at two places initially, and the hollow should be starting in such a way that two corners in the wood contact the iron away from the points.  Basically, use a rabbet or plow to take away as much material as possible, and only use the hollow or round to do the final shaping.

That said, how comfortable am I using them?  Fairly.  I tried a few tests.

Setup consisted of lapping the backs, then dropping them into the body and wedging them.  Adjustment was done with a panel-beating mallet, and if I'm going to keep using these I'll need a smaller hammer.

First, a piece of 1x4 pine.  Reasonably straight grained, very soft, and a cutoff I didn't need:  it's about 6" long.  For the round, I made the initial rabbet with my cheap "rosewood" rabbet plane (every time I resharpen it I like that plane more...).  Figuring out how to adjust it took some doing, since lateral adjustment matters more (and is more difficult) than with my other wooden planes, but once I was done it worked fairly well.  There's one quibble, but I'll discuss that in a moment.  For the hollow, I used the same rabbet to chamfer an edge, and worked from there.  Again, it worked pretty well.

So, what's the quibble?  The mouth kept clogging.  I don't know if I had the iron set wrong, if the wedge is shaped badly, or what, but the mouth doesn't clear as well as I'd like.  I feel like this is a flaw in the design:  a side-escapement plane should have less trouble, I think, because it's not trying to spit shavings up out of the top, past a pin. I'm really not sure, though.

Regardless, I ended up with a rather nice ogee profile in the edge of the board, about 1/2" wide.

The second test was in red oak, and that was a little rougher.  On the one hand, they did, technically speaking, work, and they mostly left a smooth surface behind.  On the other hand, there was some tear out, particularly at the ends of the boards, which was odd since I was running with the grain.  I think having the irons at a higher angle might help, but the end result was acceptable.  I suspect a lot of the problem was my lack of experience and odd grain in the oak, and better stock choice would help a lot.


HR Plane Test
Not bad, for a first attempt!

Final Thoughts?

For thirty six dollars, these are hard to beat.  Given that most companies selling hollow and round planes want $100+ for just one plane, it's probably impossible to beat.  Even building your own, if you buy tapered irons you're going to spend more than $18/plane:  a 1/4" iron from Lie Nielsen costs $15 before shipping right now, so unless you can buy your wood for less than $3 you're out of luck, costwise.

The quality is acceptable, if not fantastic, and I suspect that as I learn to use them they'll work better.

One final note is that there's an oddity to these planes, compared to Western ones.  On a Western style round plane, the body is straight vertically on one side (usually) and tapered vertically on the other side.  That means you can cut a fairly large part of the circumference of a circle with one.  These planes have a flat on each side of the convex part, which limits what you can do with them.  That's certainly not a dealbreaker, but it's something to consider.

Would I buy another?

This is an odd one.  The answer is no, but not because I don't think they're worth it.  As I said above, the price is unbeatable.  The reason is that I acquired some nice maple, and Lie Nielsen started selling tapered moulding plane blanks, and I think it would be interesting to make my own.  That way I can get a much larger range of sizes, and I can get the Western profile, which I prefer.  But if you want a small set of hollows and rounds, and you don't have the money to buy new Western style or the patience to find and rehab old ones, these are a good choice.

Tuesday, November 5, 2013

CTR 8: Veritas Carcase Saw

This is a review of the Veritas 12TPI Carcase Saw.  Mine is filed rip, which seems to work fine for everything I've used it for.

As with the DMT sharpening plates, I'm a little hesitant to call this a "Cheap Tool Review".  The saw cost me about $80, which isn't cheap, especially not compared to, say, the gent's saw I reviewed a while back.  On the other hand, an equivalent tool from Lie Nielsen equivalent is about $140, and the prices mostly go up from there.


 Where, and How Much?

I purchased the saw from Woodcraft, and paid about $80.

What do you get, and What's the Construction Like?

You get a saw, and not much else, unless you count the rather nice cardboard box.  I don't.  The construction is up to the normal Veritas standards:  the handle is well-formed and comfortable to hold, made out of a good hardwood (currently Bubinga, although I can imagine them changing it if the supply gets low).  The teeth are well cut and even, and the set is just about perfect.  I'm not a big fan of the resin spine -- I think brass or steel would look better -- but it feels solid, and being able to mold the spine probably cuts some off the price.  Overall, it feels very well made, and it's comfortable to use.

 How does it work?

It works great.  I bought the 12TPI saw, filed for ripping.  Why?  Well, for a few reasons.

First and foremost, I'm convinced it doesn't actually matter at this tooth size.  There seems to be some agreement among hand-tool gurus that that's the case, and my experience with this saw seems to back it up.  Simply put, with teeth this small you'll get a relatively smooth cut no matter what the tooth geometry is.  Cross cutting is always easy even with rip teeth, and ripping always sucks with crosscut teeth.  So, if you're only going to get one saw in a size, and the size includes small (12 or more teeth per inch) teeth, just buy it filed for ripping.

A lot of what I want this for is ripping.  Cutting tenons, ripping very small stock, starting rip cuts on longer (thin) stock to continue with my ryoba, and things like that.  Any crosscutting I do will be small;  tenon shoulders, or cutting small pieces to length on a bench hook.

I've used it so far for both ripping and cross-cutting pine, maple, and poplar:  it had no trouble with anything.  It cuts straight unless I screw it up, and the cut is clean and fairly smooth, with very little tearout on the back.  My one complaint is that it's hard to start, and I think that will fade as I learn to use the saw better.

Final Thoughts?

While it's not precisely cheap, this is an excellent saw for the price.  I like the feel of the handle a lot, and while I don't exactly find it attractive, it works extremely well.

UPDATE, 16 June 2014:  I've come to dislike how thin the blade is.  I know, I know, it's supposed to make things easier, but I'd really prefer it just a touch thicker.  I now have an old Disston tenon saw to compare it to, and I really like the thicker blade on the Disston.  I still like it otherwise, and that's certainly a personal preference, so I still recommend the saw.

Would I buy another?

 Absolutely, but only if I manage to break this one.  I really can't see myself having a need for a second saw just like this.  If I decided to buy a dovetail saw, I'd seriously consider the one matching this saw.  Sadly, they don't make a larger saw;  I'd really like a saw roughly 14" long, with at least 4" of depth and around 12 teeth per inch, but those are hard to find.

Thursday, June 13, 2013

CTR 6: Deer brand Gent's Saw

Let's get it out of the way right now:  This is a $16 saw.  It's not going to be the best tool you'll ever use.  Woodworking is one of those weird places where, up to a point, you really do get what you pay for, and $16 is CHEAP for a back saw.

This is the saw that WoodCraft sells as the "4140/250 Straight Back Saw".  My first impression was pretty poor, but I've figured some things out since then.

What do you get, and what's the construction like?

It's a back saw;  wood handle, steel saw plate, steel back.  The handle is a touch small for me, but I find that the grip is reasonably comfortable.  It's around 15TPI, filed rip.  Remember here that with teeth that size, it really doesn't matter whether teeth are filed rip or crosscut:  it does both equally well.  Mine has held up pretty well:  the printed logo is worn off to just about exactly half the depth, showing that it's really deeper than it needs to be for most things I use it for.  I think that, in large part, that's because I like the Shark ryoba better for longer cuts. 

 How does it work?

Initially, it was terrible.  Slow cutting, hard to start, hard to keep on a straight line, and with a miserable finish left behind.  If it wasn't for the fact that it's the perfect size to use with a bench hook, and the ryoba isn't, I probably never would have used it.

However:  last week I went out to the shop to putter.  I've promised myself I'll spend some time, no matter how little, doing SOMETHING in the shop every day.  I picked up the saw, and thought about trying to hand cut some dovetails, but I just couldn't bring myself to deal with the hassle of using it.  So instead, I started trying to figure out why it didn't work well.

A saw is a simple tool.  It needs:

1) A straight, flat sawplate.  This one had that, so that wasn't the problem.

2) A handle you can grip reasonably comfortable for as long as you're going to use it.  This saw also had that, so that wasn't the problem either.

3) Sharp teeth.  OK, the thing could use some sharpening, but it's not THAT dull.

4) Proper set to the teeth.  Huh.  To quote, "Well, there's your problem!"  The set on the teeth made the kerf nearly three times the thickness of the saw plate.  That's ridiculous.  How many of the problems could fixing that address?  Let's see... Slow cutting?  Check.  Hard to start?  Check.  Hard to keep on a line?  Check.  Lousy surface after cutting?  Maybe. 

Once I'd figured out the problem, I decided on the easiest solution.  The back of my machinist's vise has a small anvil on it, and I have a small hammer.  I went up the blade, tapping each bunch of teeth with the hammer.  This is a lightweight hammer, and I basically dropped it on the teeth from about five inches up.  The teeth had visibly less set when I finished one pass, so I took the saw back to the bench.... and it's like it's a completely different tool.  Starting is a lot easier, it cuts straighter, it cuts far, far, faster, and the surface left behind is a little bit cleaner.  Not much, but a little.

At this point, the saw could really use sharpening, but it's no longer a matter of cursing when I realize I need to use it.  Now it's just another saw in my toolbox, and worth grabbing if I have a job of the proper scale for it.

Final Thoughts?

I'm normally opposed to tools that need work before you can use them.  If it's used, fine... all tools need tuning once in a while, and who knows what the previous owner did.  But, out of the box, a saw should be sharp, set, and ready to cut.  This one isn't.  But... it's $16.  A good dovetail saw will cost four or five times that:  that's why I don't have one.  So this is a reasonable compromise, in my opinion.  If this is what you can afford, it's possible to turn it into a pretty decent tool with very little work.

Would I buy another?

If I needed a really cheap saw of this size, sure.  For what it is, it works fine.  That said, I plan to sharpen it once, then find a higher-quality dovetail saw to use instead.  Sharpening it will give me practice filing teeth that small, and give me some time to find a good dovetail saw I can afford.

UPDATE:  I'm now using a Veritas carcase saw (reviewed later on in this series) for almost everything I used to use this saw for.  It's in my tool chest, and it comes out occasionally for cutting really small pieces, but I barely use it.  Like I said, don't buy this unless you can't afford to buy better.

Wednesday, May 22, 2013

(Semi) CTR 7: DMT Diamond Stones -- Three 6 inch stones

I've hesitated over writing this review here.  So it gets to be a Semi-Cheap Tool Review, and part of the series.  A $75 set of sharpening "stones" is not exactly cheap, though it's less expensive than some sets out there.  On the other hand, every woodworker will need to sharpen tools sooner or later, and it's hard to get inexpensive stones these days.  Even sandpaper is kind of pricey if you do enough sharpening.

I got these in December.  Unfortunately, I'd more or less finished packing up my shop to move, and it's taken this long to get them back out and give them a fair test.

So here are my thoughts.

Where, and how much?

These are available a lot of places.  At the moment, you can get them from Amazon (here) for about $75.  They may be more or less expensive other places.

What do you get, and what's the construction like?

This is a kit of three diamond plates in a fitted wooden case.  The plates are 325 (blue), 600 (red), and 1200 (green) grit diamond mesh plates on a plastic substrate.  The wooden case is decent, and well enough fitted to prevent damage.  You can use the stones wet (with water) or dry.

How do they work?

Quite well.  Up until I got these I'd been using an old combination oil stone;  medium on one side, fine on the other.  It worked well, and still does, but oilstones are comparatively messy.  They must be oiled, and they tend to stain if you make the mistake of putting them down on cloth or wood.

I've done three real sharpening jobs with these.

First, the standard stuff.  Chisels that I'd gotten moderately sharp, then used until they were dull.  I skipped the coarse stone here, and did the 600 and 1200.  I always follow with a leather strop charged with some kind of yellow stropping compound.  I've lost the packaging and don't recall the details, so that's all I can tell you.  These worked great.  Taking curls off wet Douglas Fir end grain great.  I'm pretty sure my technique hasn't gotten that much better, so I have to assume the plates are a lot better than my old oilstone.

Second, a first-time setup.  I had a plane that I bought unused, but never did more than a cursory swipe over the oilstones.  So it had the factory grind and a little more, but had never been what you'd call "sharp".  I started that one on the red plate, but moved back to the blue when I figured out how flat the bevel wasn't.  Once the bevel was sharpening as if it was fairly flat, I moved to the red and green plates, followed by the strop.  This particular plane isn't what you'd call a precision tool (it's the Shelter Institute rabbet plane I reviewed last year), and I'm not very good at adjusting it, but it works a lot better now than it did.  It still needs some tweaking, though.

Finally, a damaged plane iron.  I have an old Stanley #5 that I use for stock removal.  It wasn't good for much else, because there was a big nick - maybe 1/32" deep, maybe a bit more --  I couldn't be bothered to remove from the edge.  I had a good #4 for smoothing, why do I need a #5 set up for it?  This was the real test.  The iron is exactly the same width as the plate (about 2"), and had been indifferently sharpened with the nick in it.  So I started with the blue 45 grit plate.  I still don't have the nick completely out, because I only had about 10 minutes to work.  It's faster than the 80 grit sandpaper I've used for grinding, and leaves a much nicer surface.  I followed it up with 20 strokes each on the red and green, then a few on the strop.   I also ground the back on the blue plate and polished the back on the green -- it's not quite mirror finished now, but it's pretty close, and the nick is almost entirely gone.  Total elapsed time on that blade, maybe 8 minutes.  It takes nicer shavings, too.

Final Thoughts

I'm not going to tell you to rush right out and buy a set of these.  They're nice, no doubt about it, but there are some limitations.  If you have a system you like, and it gets your tools as sharp as you want them, stick with those.  Don't give in to the new tool temptation.

So what were the limitations?  The main one is size.  These plates are 6"x2".  That's fine for chisels, pocket knives, and rabbet planes, but it's a challenge on anything big.  For the #5 that I was working on, I had two choices:  skew the iron and run it across at an angle, or use my fingers as runners to make sure it didn't slip off the edge.  With my try plane (an old Siegley 24" transitional), I won't have that choice:  it uses an iron about 2 5/8" across, so it will be skew or nothing.  If you don't sharpen any big tools, that's not a limitation.  For me, I'm considering buying a larger stone or plate just for my try plane.

Would I buy another?

If these vanished, I'd probably go get another diamond plate set.  That said, I think I'd look for a larger plate.  I'd like one large enough that I can sharpen any of my bench tools without having to skew them, and that means I need a stone at least 2 5/8" wide.  More than that would be better.

Friday, February 10, 2012

CTR 5: Shelter Institute Wood Shoulder(?) Plane

Where did i get it, and how much did it cost?

I bought this because I liked the look and feel of it, and it was cheap.  It cost me around $27, after tax, and since I bought it at a woodworking show I didn't have to pay shipping.  Hey, why not... at the worst, I've got some nice rosewood to use for something, right?

What is it?

First things first:  What IS this thing?  Is it a shoulder plane?  A rabbet plane?  Something else entirely?  I'll be honest, I don't really know.  I tend to think of it as a shoulder plane, but my understanding is that shoulder planes are supposed to be low angle to improve their ability to cut cross-grain.  This is NOT a low angle plane, and while it's not completely terrible cross-grain, it's not very good either.  But I'll get to that.  Since the Shelter Institute doesn't actually show this on their site, here's what it looks like.  Maybe some kind reader can tell me what this is...


rebate plane 01

Sorry about the glare.


What's the construction like?


I'll point out one thing right away:  this is a wooden plane.  There's no adjusting screws.  There's no fence, or depth gauge, or anything like that.  It's a block of wood with a hole in it, and a wedge to hold the blade in place.

The person at the booth claimed the cutter was of Japanese manufacture, and was one of their laminated blades (hard steel and soft welded together, and set up so the hard steel provides the cutting edge.  It may well be, but I can't prove it is or isn't.  For the sake of argument, I'll assume it is.  It kind of looks like it, anyway.  It didn't come out of the package razor sharp, but it did have a reasonable edge.  A few minutes with an oilstone and a strop and it took some hair off my arm just fine.

The body is rosewood, or something remarkably like it, and feels pretty nice.  The sole is smooth and flat, which is a bonus.  Here's where I mention probably the only real problem I found:  the sole isn't square to the sides.  It's off just about exactly one degree, according to my angle gauge, which translates to something like 2 thousandths of an inch height difference across the width of the plane.  I'm going to say that's good enough for me, but it may not be good enough for you.  You'll have to decide.  And, since these are wood, the next one may be perfect, or may be off by two or three degrees.  You pays your money, you takes your chances.

The cutter fits cleanly in the body, and the wedge fits well.  Not much more to say, here...   some indents to make it easier to grip would have been nice, but it's not bad to hold as is.

How does it work?

Quite well, once I got the hang of adjusting it!  Setting a wooden plane is a skill in and of itself, and one I didn't have before this.  But, since pictures speak louder than words, here are some pictures of experiments with pine.

1) A nice curl, with a heavy cut.  I didn't bother to measure it, but it's about as heavy as I've done with my Stanley #5, so I'm satisfied.

heavy cut shavings

2) Heavy to fine cuts.

four shavings

3) The two finest, closer up.  I didn't quite get down to see-through, but it was close.


wafer thin

4) Cross gain shavings:  not as fine as the ones with the grain!


cross grain shavings

5) The wood -- with the grain and across it, after planing.  Cutting cross-grain, I cut a guide with a hand-saw first, then followed that with the plane.  The edge it left was terrible when I let it work on its own.


long-grain cut

cross-grain cut


There was one design issue that showed up while I was testing.  If you're not careful, the opening around the blade tends to fill up with shavings.  If it gets packed enough, it can actually loosen the wedge, which is a problem!

UPDATE:  I've been able to alleviate this somewhat by shaving the wedge down until it's angled to one side.  It's still not perfect, but it takes longer to clog now.

design flaw


Final Thoughts

Overall, it works well.  It leaves a clean surface when cutting with the grain, and it's light and easy enough to set up that I can see it having value for cleaning up a rabbet, say.  I'll probably stick with my Miller's Falls 85 for most rabbet work, and almost all cross-grain (the nicker makes that a lot easier).  In the end, it's light, cheap, attractive, and reasonably effective.  Setting the depth is getting easier, so I can see a time when I don't have to think about that, I can just do it.

Would I do it again?

That's a hard question with this.  For me, it's a tool in search of a job.  It doesn't do the job I was hoping for, that of an actual shoulder plane, and I don't really need another rabbet plane.  If I didn't have the MF 85, yes.  It's absolutely a reasonable choice for cutting rabbets with the grain, and it can be made to work, more or less, for cutting across the grain.  But since I DO have the 85....  I'm not sure.  The thing cost $27, which isn't much, and it gives me one more option if I have a job to do.  That might be worth it.  It might not.

Either way, it's a decent tool, and some more practice and sharpening will probably leave me a lot happier with it.

UPDATE:  For whatever reason, I've been using this more recently.  I still quite like it, and if you need a straight rabbet plane, this is a good choice.  I've now used it in pine, poplar, and red oak, and it works well in all three.  In fact, I cut all the rabbets on a small oak box (around 3x3x10) with just this, and it worked beautifully.  For parts that small, this is much easier than trying to use a metal rabbet plane with a fence.  If I had no rabbet plane, and one of these came along for a price like I paid, I'd snap it up.  It's a good choice, and has held up well.

Friday, January 20, 2012

CTR 4: Shark 10-2440 Fine Cut pull-saw

My last entry was about table saws, and the fact that they are not, in fact, essential to being a woodworker.  This is the tool that convinced me that was true.  OK, that's hyperbole.  I was already convinced, but this was a nice supporting argument.

Where, and how much?

   I got mine at Sears, and I paid around $20.  I've seen them at Amazon for the same, so I'd say that's the going price.


What is it?

   This is a Japanese-style saw, which means it cuts on a pull-stroke, rather than the push.  You can find all sorts of arguments for and against this both on- and off-line, so I'll limit my commentary to this:  Some people love it, some people hate it, and you should try for yourself before you make a decision one way or the other.  What that means in terms of use is that the blade is both thinner and floppier than you'd expect in a saw.  That's not the problem it would be in a European saw because it doesn't rely on blade stiffness to cut:  the force of pulling it through the wood keeps it straight.  That means it can cut a much thinner kerf, and, if sharp, can cut much more easily, because it's not trying to remove as much material.

   The other difference between Japanese-style and European-style saws is how sharp the teeth are.  On a well-sharpened European saw, you can hurt yourself.  Get your finger in the way of the stroke, and you're going to know it.  But it's pretty hard to cut yourself with it other than that.  This saw is razor sharp.  Each tooth is like a tiny little knife blade, and it WILL cut you if you grab it wrong.  Get used to that.

   Some more details:  The cutting edge is around 9 1/2" long.  One edge has about 9 teeth per inch, and is intended for ripping, while the other is around 17 TPI, and is intended for cross-cutting.  The blade widens towards the tip, and is narrower near the handle.  It looks odd, but is standard for a Ryoba.

What's the construction like?

   It's not bad.  There were some corners cut, no doubt about it, but they were in the handle, not the blade.  The handle is plastic, and the knob to fasten the blade in place is also plastic, and starting to wear.  I figure I have, at most, another year before the knob gives up and I have to find a way to replace it.  I'm willing to take that sacrifice for the price.


   The blade is an interesting question.  The teeth are cut, not stamped, which is a plus.  It feels (and cuts) like it's fairly high quality, but it has impulse hardened teeth.  That means that the teeth will hold their edge for a long time, but can't be sharpened when they dull.

   For all that I like it, this is essentially a disposable tool, and I'm not a huge fan of that.

How does it work?

   You might have guessed from the beginning that I like this saw.  You'd have guessed right.  I bought it on the grounds that, first, I wanted to see what cutting with a pull-saw felt like, and second, it was cheap.  It cuts extremely well.  Not "extremely well for a twenty dollar saw," just "extremely well."  I've crosscut and ripped both pine (ripping 1x6 on this is remarkably simple) and red oak.  Pine it had no trouble with: Chopping up 2x6 is easy, and ripping 1x6 width-wise (I needed a piece 5" wide by 1/4" thick) was no problem at all.  I've also cut plywood from 1/4" to 3/4", PVC pipe, and plastic gutter.  It had no trouble at all with any of those.

   Red oak is, perhaps, the one place this fell down.  Cross-cutting a 3/4" thick piece was fine.  Slower than pine, but it's a much denser wood.  It was still easy.  Ripping across the 3/4" dimension was also fine.  Then I tried ripping on the 5" dimension.  That... wasn't so easy.  I don't have a good European rip saw, so I'm not sure how much easier it would have been, if at all, but I don't recommend it with this saw.  Now... this is a fine cut saw.  I'll talk more about final surface in a minute, but the point of this saw is to allow precise, smooth cuts, and it delivers.  Ripping hardwoods is hard.  This saw was able to do it:  If I was willing to devote the time, I would have made it the full length of the board.  That wasn't the problem.  The problem was the amount of time.  I figure I spent about 20 minutes, and ripped about four inches.  I needed a two foot long board cut, and I just didn't have that kind of time.  Shark does make what they refer to as a "carpentry saw", which they claim is set up for more aggressive cutting.  It's likely that that would have worked a lot better, but I haven't tried one yet, so I don't know.

   For detail work (it is called a "finecut" saw, after all), it's superb.  I used it for my first hand-cut dovetail, and it was quick and easy to control.  I've done the same with an inexpensive (I'm tempted to say "cheap") backsaw from Woodcraft, and it sucked.  That one may just need sharpening, and I'll review it once I've given that a try.

   The final surface left behind by this saw is superb.  The cuts are, in general, smooth enough that they don't need much further treatment.  I can get a cleaner finish with a chisel, but not with any saw I've ever used.  I don't think I've seen any finish from a saw smoother than this, either.  Yes, it will still need a little sanding, planing, or scraping, but not much.  I decided to smooth a cut from this, and started at 220-grit paper.  It didn't take much work to completely erase the saw marks.

Final Thoughts

   For $20, I got a decent dual-purpose saw, without having to compromise on a single edge that tries to both rip and crosscut.  It cuts smoothly, cleanly, and, when I'm not trying to rip oak, quickly.  It leaves a nice surface behind, and is comfortable to use.

   My only real reservations about this saw are the quality of the grip and the impulse hardened teeth.  If you need a saw and you don't mind that it's disposable, you could do a lot worse than this for the money.  If you want a tool you can re-sharpen... you're going to need to spend some more money.  It depends on how you look at things whether this is worth the tradeoff.

Would I do it again?

   Probably, with reservations.  I'm currently looking for a good-quality used European saw.  I've never used one that was in good repair, so I don't have a lot of comparison.  I'm really not excited about buying more disposable tools, so I'd really prefer to spend extra money to get something sustainable.  In a pinch, I'd buy one of these in a heartbeat, over any big-box offering at a similar price.  There's no question in my mind that this is a good tool.  It's just not a long-term purchase.

UPDATE:  June, 2014.  I'm still using this saw, with the original blade.  Yes, it cuts noticeably slower than it used to, but this saw is well over two years old (I think I'd actually had it about a year when I wrote the original review), and the cut is still smooth and straight.  I'm even more inclined to recommend it now than I was then.  The knob I was worried about still holds just fine, though it feels looser every time I use the saw.  Seriously... despite the low price and impulse hardened teeth, it looks like they only cut corners in places it didn't really matter.

Tuesday, January 17, 2012

CTR 3: Ryobi BTS21

EDIT:  Pointed out by a reader at Woodworking Talk, this is the BTS 21, not 211.  Not sure how I missed that, originally.  Also, this saw is no longer available new, but may show up in the used market occasionally.

   So here's a big one.  It's a Ryobi table saw, sort of mid-size (by their standards).  It's not a benchtop, it's not a cabinet saw... so what do I think of it?

   First off:  I've had this for over a year.  I've done a lot of cutting on it.  The biggest cuts I've done have been cross-cutting 4x4, rip-cutting 2x10, and cutting plywood every which way.  I've also cut up a fair amount of 1/4" luan.  I've done dados in plywood, and both regular and pressure treated dimensional lumber.  I've gotten good use out of it, and despite the fact that this review isn't exactly positive, I don't think I made a big mistake. I just didn't know what I needed.

UPDATE:  I sold this saw a couple of years ago.  It continued to work reliably, but I was moving, and I met a guy who was starting out as a contractor and wanted a cheap job-site saw.  He got a saw, I got a hundred bucks, and I didn't have to move it.  It was a good deal for all of us.

   It's kind of an odd beast.  Rather than the standard miter slot, it has a sliding miter table.  Some people love these, some people hate them, and I'm in the middle.  It's heavy for a portable saw -- something like 85 pounds -- but light for a full-size saw.  While the wheels make it pretty easy to move around, it's pretty hard for one person to get it into a car or truck.  Ryobi sells (or sold) a dado insert, and it's set up to allow the use of dado stacks, but it can only take one up to 5/8" wide.

Construction:

   While not fantastic, the saw is reasonably solidly built.  It IS a portable saw.  There's no way to get around that.  That means there are some tradeoffs:  it's not possible to build a collapsible stand that's as solid as a cabinet base and still portable.  You just can't do it.  But the top has stayed flat (see my comments on the sliding miter table for an exception), the base has been easy to work with, and nothing has broken.  Some pieces that would, ideally, have been cast iron are cast aluminum.

Safety:

   Safety is important, I think we can all agree with that.  So how safe is this thing?

  Issue one:  it lacks a riving knife.  It does have a splitter, guard, and anti-kickback pawls, but a riving knife would have been better.  The splitter occasionally leans a bit one way or the other, which can make things interesting when you've gotten a piece of wood past the blade and into the pawls, and then find you can't advance any.  A tap with a push-stick straightens it out just fine, and it's never been a serious issue, just irritating.

  Issue two:  Getting to the shutoff switch can be interesting.  Say you're cutting a big piece of plywood -- a full sheet, 4x8 -- lengthwise.  Say something goes wrong two feet in, and you need to shut off the saw.  You'd better be able to reach the plug, because you're never going to reach the switch!  This isn't really a surprise -- there's not much space to move things around! -- but it is unfortunate.  I would have preferred to see the switch on the left side, where I could reach it without letting go of anything with my right hand, even if I was cutting something very wide.

  Issue 3:  You can't get a zero clearance insert for love or money.  They don't exist.  This saw uses super-thin metal for the inserts, so to custom make one you'd need to make a panel that was something less than 1/16" thick.  Sure, it could be done, probably, but it wouldn't be easy.  I've considered buying a second dado insert and hot-gluing a sheet of 1/4 plywood onto the bottom, but I haven't done it yet.

   Now, that said:  this is a cheap saw.  The splitter is solid, and the splitter, guard, and pawls are all a single unit.  It's quick and easy to remove and install:  it takes maybe 20 seconds.  So I've never felt like there was any reason to make a cut without those.   The guard is easy to see through, and does a good job of keeping things away from the blade.  The anti-kickback pawls appear to work, although I've never tested them in an emergency -- they do make it impossible to pull wood back, though, so I assume they'd work as advertised if they were really needed.

Function:

   Let's start with the basics:  does it cut?  Yes.  Does it cut straight?  Well... that depends on the user.  The fence system is pretty poor.  The measuring system is bad enough that I don't bother to use it for anything other than rough measurements:  "OK, I need 23 3/16 inches.  Slide it out to 23 1/2, then grab the framing square."  The fence can be made to be square, but you'll need to check it each time you set it.  Once it's set, it's solid -- I haven't moved it accidentally yet! -- but if you're incautious you can set it a little bit off of square.  Maybe a degree or two.

   What about power?  I've never had a problem.  It slows down cutting PT lumber, but I did cut 5/16" dados in over a hundred feet of the stuff without trouble.  It took a slightly slower feed rate, is all.  Not a big deal.  Cross-cutting 4x4 isn't an issue, except that it's at the very limit of the depth of cut.  Any warp in the wood can mean you don't QUITE get through it.  I did try a rip in 4x4 just to see what would happen, and that was fine too.

   How about that sliding miter table (SMT) I mentioned earlier?  Well, first things first:  I love the concept.  It's a built-in cross-cut sled.  How cool is that?  More than that, it's a built-in cross-cut sled with an adjustable fence!  And angle measurements cast into the tabletop, so no need for a protractor!  For 90 degree cuts, just set it to 90 degrees, and... um.  Wait.  The 90 degree line is almost 1/8" wide.  What do I line up with?

   Right.  So right there is the first big problem with the sled.  The cast in angle measurements are just plain bad.  Again, they're a reasonable approximation, like the measuring tape built in for the rip fence, but they're not exact.  They're within a few degrees, but it's impossible to get them closer.  So you do need that protractor or angle gauge after all.

  Next problem:  the miter fence isn't very stable.  I have had it shift when I didn't want it to, and there's only so much you can tighten down the knob.  If you're careful, it's not a problem.  But if you're not paying attention, you can really mess up a piece.

   Here's the big one:  the miter table isn't perfectly flush with the rest of the table.  Not much -- less than a sixteenth -- but noticeably.  Normally that doesn't matter much:  if you're cutting through a piece of wood, you wind up having to raise the blade another sixteenth of an inch.  You'll probably never notice.  It never bothered me.  BUT.. if you're cutting dadoes using the SMT, they're likely to be the wrong depth.  That can be a big problem if you don't remember to compensate for it.  The main thing is to remember to measure your depth from the SMT, not the regular table top.

   The last issue with the miter table is just that it isn't a miter slot.  Most of the jigs you'll find writeups for assume you have a miter slot.  That's fine, and you can modify most of them, but you'll never be able to just buy a pre-built jig and have it work.


Final thoughts:

   I bought this table saw because I needed a table saw, and it was cheap.  Home Depot accepted a Harbor Freight coupon, and I got the saw for, as I recall, a little under $200.  That's not bad.  I'm not sure my other options in that price range were any better.  As a rough cut tool -- think general construction work -- it's fine.  For finer woodworking.... it can be made to work.

   I don't want to be too negative here:  I knew what I was getting into by buying a cheap saw, and I got it.  For rough work, it's fine, and most of the problems can just be worked around for finer work.  For what I knew at the time, and what I needed at the time, I made a reasonable choice.

Would I do it again?

   No.  Given what I now know, it's not sufficient for what I need.  With what I now know, I would have put that money into either a used cabinet saw or, more likely, a cutting guide for a circular saw and a better router.  Put simply, this is a lousy tool for any kind of fine woodworking.  I do most of my sizing work with a circular saw now (with a good guide, I can get easily within about 1/32 of my intended final size), and only pull this out for rough work and dadoes.

Thursday, January 12, 2012

CTR 1: Harbor Freight 4-speed Woodworking Bandsaw

Note:  Originally posted 11-16-2011 at http://woodworkingtalk.com.  This is now considered to be the first of the Cheap Tool Reviews.  I question the decision now, but it's still pretty cheap for a band saw, so I'll live with it.

I just bought one of these after reading a lot of reviews. One problem I had in making a decision was that the reviews I was finding were almost all at least a few years old, and there have been some changes to the design of the saw since then. So, in hopes of helping out people who are looking now, I thought I'd post my thoughts.

To start off, I have almost no experience with bandsaws; I've used one before, but mostly for metal cutting, not wood. Bearing that in mind, here we go..

0) What I didn't use.

I knew from the reviews that a link belt was highly recommended. Since I was at HF anyway, I bought theirs. Other than that, everything is stock, although I'll be replacing the blade as soon as possible.

1) Moving and packing.

It's a heavy box, but not completely unmovable. I got it out of my car on my own by sliding it onto a furniture dolly, then rolled it into the garage. Getting parts out of the box was an interesting experience. The base and table were on top, right up against the cardboard, set into a molded styrofoam tray. Removing the tray revealed the rest of the saw, assembled and with a blade in it, and the motor. No evidence anywhere of fasteners or a manual. Why? Well, because those were UNDER the saw. In a little nook that was completely hidden until you'd lifted the saw. Anyway. On the plus side, everything was in the box (with one odd sort-of-exception, which I'll mention later), which rather surprised me.

2) Assembly.

A) The base. This went really smoothly. Contrary to my expectations, the instructions were quite clear, all the parts were there, and all the necessary screw holes were cleanly cut and lined up where they were supposed to. The base looked like it was going to have a lot of gaps, but tightening down the fasteners with a wrench closed them all up. As a side note: except for the belt guard housing, every nut and bolt used in assembly is 13mm. I recommend making sure you've got a 13mm box wrench AND a 13mm driver on a ratchet before you start working. You'll want them both.

B) The saw. There wasn't much to assemble here. It was all pre-built, with a blade installed, and all the fasteners tightened down. That's a bonus, because this is where the manual was least clear. The table and its mount DID need to be installed, which was quick and easy. It was also where the "sort-of-exception" I mentioned above came in. The instructions claim you're supposed to use two M8x30 bolts to attach the table bracket. By that time in the assembly, I only had one of them left. However, I also had an M8x35 (more or less) bolt that wasn't called for in the instructions anywhere. As it turned out, it was exactly the right length for the right-most of the two holes I was supposed to be bolting the bracket into, so I decided to just use it and not worry.

C) The motor. Installing the motor was a pain, but not terribly difficult. It absolutely required two people; the motor has to be held upside down under an angled bracket, and then bolts have to be run through from underneath and nuts put on them from the top. I can't help feeling like there must have been a better way to design that.

I'm also going to mention the belt-guard box here: that also sucked, and was probably the hardest part of the entire assembly. It requires putting four fairly small pan-head bolts through four similarly small holes, all on the inside of the assembly, and the drive pulleys pretty much meant I couldn't get my hands anywhere within four inches of the rear holes. A long pair of needlenose pliers solved the problem, but it was a nuisance after everything else being so easy. Assembly probably took around an hour and a half, including checking to make sure the wheels and pulleys were lined up and tensioned correctly.

3) Fit, finish, and accessories.

I'm favorably impressed by the saw as a whole. While the sheet metal edges on the base aren't rounded over, they're also not as sharp as some bases I've worked with.

Once all the nuts were tightened, everything seemed quite solid. The blade tension was really low (essentially no tension) out of the box, but the tensioner works well, and the knob on the new version sticks up above the top of the saw, so it's easy to use. While the table bracket looks and feels like plastic, it seems to actually be cast aluminum with a plastic coating -- tap it and it rings like cast aluminum, and it's too heavy to be plastic. One frequent complaint in the old saw was that the side panels that cover the wheels aren't hinged. Well, they are now. That's mentioned in comments on a few older reviews, but I thought I'd make it part of the body of this one. The lower panel on both my saw and the display model has to be really slammed shut to latch; I'll likely replace the catch with a magnet eventually.

Something I haven't seen mentioned anywhere is that the new model has a brush set to sweep off the lower wheel, out of the box. I'd planned to buy and install one, but now I don't have to.

There are two places where there are angle gauges: the table tilt measure, and the miter gauge. Neither is perfect, but both are adjustable. The table's gauge was off by around a degree: once I'd squared the table to the blade, I reset it to zero, then used a Wixey digital angle gauge to check the rest of the readings. They're certainly very close - within two tenths of a degree, as far as I could tell -- and should do for most purposes. For anything really precise, I've got the digital gauge, which is easier to read anyway.

The miter gauge... what can I say about it? It's cheap plastic with numbers molded into it, and it's screwed to a cheap piece of aluminum c-channel that more or less fits the miter slot. The tick marks for the angle indicators are a good eighth of an inch across. We're not talking "high precision" here. If I need to set an accurate angle, I'm going to use a protractor, rather than trusting the miter gauge. It does have an adjustable needle, so I can set it to "90 (or 30, or 45) degrees plus or minus a little", but that's about as good as it gets. It also doesn't really slide through the slot cleanly, because it gets hung up on the mouth for changing the blade. I'm planning to round off the front corners of the gauge, to see if that helps. It does more or less lock in place, but I suspect it will cease to do so pretty quickly. I don't expect to need the gauge all that often, though, so maybe it won't really matter.

A number of people complained about the drive belt being lumpy and uneven. While I didn't use the one I got -- I'd bought a link belt, so why bother with it? -- it seems to be OK. I'd still say go with the link belt: by all accounts they decrease vibration, and the added expense brought the price even with the Ridgid and Porter-Cable 14" saws, rather than above them. (Actually, if your local Lowes/HD won't accept HF coupons, it's still a lot cheaper than either...)

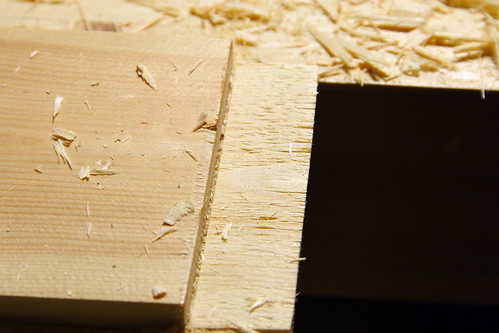
The blade that came with it is, as you'd expect, not very good. I made a couple of test cuts in some scrap 3/4" ply, and it works, but not well. It did cut fairly straight, and with essentially no drift across a six inch cut, though, so it's probably passable as an emergency backup. The manual claims it's 6TPI and 3/8" width. I haven't counted, but I would have guessed 8 or 10 TPI from a quick look. I did notice a couple of damaged teeth before I used it, and I suspect there are more, so it's not going to get used much, if at all.

4) Final thoughts.

I had just about been convinced to buy a Grizzly before I bought this. It occurred to me, though, that I know for a fact I was going to want to cut metal with it, and the Grizzly just doesn't step down to speed that I'm comfortable with for that. Between that and the option to save $200, the HF model seemed like the right choice. If money hadn't been a concern, I probably still would have gone with the Grizzly, and bought a cheap low-speed benchtop or something for cutting metal. As it was, versatility won out over quality.

I do plan to buy the riser kit for the saw: it's currently available from HF parts for $85 + shipping, although it can't be bought in the stores. I'll be building a fence -- there was a fairly nice set of plans in the most recent ShopNotes for a rip and resaw fence that can accommodate for drift -- rather than buying one, and I have pretty much all the parts for that. So with the addition of the riser and a couple of good blades, I'll have a tool that should do everything I need (and most of what I want) for a pretty good price.

Overall, I'm pleased with my decision, and suspect I made a right choice, if not THE right choice.


---------------------------------------------------------------------------------------------------------------------------------

Would I recommend this saw?  Yes.  But, as with most HF products, be prepared to bring it back if you find out it's a lemon.  They're not likely going to all have all the parts, so assume that yours will have some problems.  If you want a reliable out-of-the-box machine in this price range, I'd recommend the Porter-Cable.  That's the only one I haven't seen reports of people needing to make major modifications to.  It's also one of the least versatile, so you take your chances... for me, the HF was the right choice.

If money isn't much of an issue, I'd probably recommend going higher-scale.  The miter gauge with this one is really junk, and it doesn't have a fence.  Going with, say, the Grizzly I thought about would have resolved both of those problems, out of the box.  It is a lot more expensive though, so again, it's about making tradeoffs.

Monday, January 9, 2012

CTR 2: HF Mortise Gauge

Cheap Tool Review #2.

I picked this up in the fall, and only just used it for the first time, though I'd checked it to make sure it was all there and not broken when I got it home.  Here are my thoughts.

Cost:  How can you beat it?  Full price (as of this writing) is $10.  I got it on sale and with a coupon -- I think I paid under $3.50.  The other marking gauge I have is a Veritas Wheel gauge, and it cost $35.  That's a heck of an increase.

Construction:  While I'm not sure what kind of wood it is, it seems to be reasonably hard.  The finish is thick, and should provide a fair amount of construction.  While the beam isn't perfectly fitted through the fence, it IS reliably consistent, and it doesn't wiggle at all once the thumbscrew is tight.  The brass castings are pretty nice -- if I ever decided to build my own gauge I'd probably salvage them -- and the pins are solidly attached.

Use:  This one's harder to say.  What I've discovered is that I don't LIKE pin-type gauges.  I bought a Veritas Wheel Marking Gauge the same day, and I use it a lot.  The HF mortise gauge... well, if you like pin gauges it seems like it would work well enough.  It's solid, there's no slop, and you can drag it across the piece without worrying about the beam sliding around.  The catch is that the pins aren't sharp, so they don't cut across the grain -- they try to follow it.  I've never used an expensive pin gauge, so I don't know if they have the same tendency, but I can't imagine that they don't.  For my use, I'll stick with wheel or blade type gauges.


As a note, I'm told some people have filed the points to be narrower and more blade-like.  Now that I've learned that I don't like them as they are, I may give it a shot.  And for $3.50, it's not a bad deal for those occasions where I really need to mark two parallel lines.  I just won't use it most of the time.

Final recommendation:  If you're really hard up for cash, or if you already know you like pin gauges, this is a nice deal.  As with everything from HF, make sure all the pieces are there and it's built right, since their machining is variable, but it can work.  If you're not that hard up for cash, or you're not sure how you feel about pin gauges, buy something better.  This is a time when some extra money nets a lot of extra value.  You can probably find the Veritas Wheel gauge for $30 if you wait for a sale, and it's a FAR nicer tool.

UPDATE:  Thanks to a reader at woodworkingtalk.com, here's an article about filing the points of a pin-type gauge into knives.  I'm not convinced it will work on this gauge, since the pins are pretty tiny to begin with, but I'll give it a try and post another update.

UPDATE, 6/16/14:  This is now my go-to gauge for most things.  It's quick an easy to adjust, and filing the pins to more of a football shape (instead of a cone) make it work a lot better.  For long marks cross-grain, I frequently use the Veritas wheel gauge, but I've come to a point where I reach for this HF gauge more often.  That said, the Veritas gauge is more accurate and will certainly last longer, so it's not at all a one-sided debate.