Wednesday, May 13, 2015

A Traveling Chest - early thoughts

I love my Dutch-style chest, but it's not actually very portable.  I mean, yes, I can lift and move it with some help, but it's not "toss it in the car the morning of a trip" portable.

So I've been thinking about it, and I've decided to make a pair of devices to solve the problem.  One, which I'll build later, is a "milkman's bench", from the plans in Popular Woodworking a while ago (June 2013, according to the internet).  The first project is a small tool chest.

I'm planning to base it on a Japanese toolbox design, with a few modifications.  There's a sample of the design here.  I've seen a few variations, and my intent is to borrow a few of them.  While the standard design has no dividers, I'm considering adding one, to separate saws from everything else.  I'm also planning to set up the top so that I can set it on a bench or tabletop and use it as a bench hook and shooting board;  that will probably necessitate replacing it periodically, but that's OK.  The idea is quick and inexpensive.  To be honest, I expect nails to cost more than everything else put together, since I'd like to do square nails, and clench them in some spots.

For tools, I'm going to try to figure out a really minimal set.  Here's what I'm thinking at the moment.


  1. Saws.  My Shark Ryoba should handle the majority of chores, being cross or rip cuts in more or less any wood.  I'm also planning on a coping saw, since curves aren't really practical with the Ryoba.  I'm torn on the Veritas Carcase Saw;  it's tremendously useful, but I'm not convinced it's worth the weight.
  2. Chisels.  I'm planning on 1/4, 1/2, and 1" chisels.  They should cover just about any need I have.  These will need a tool roll, but that's OK.
  3. A hammer and a mallet.  My mallet at the moment is a cheap Harbor Freight panel beating mallet, and it works great.  The hammer will drive nails, and the mallet will adjust planes, drive chisels, and knock things together when I'm doing glueups.
  4. Brace and bits.  I'm a little bit torn on this.  They add a LOT of weight, but they're really the best option for making holes bigger than about 1/4".  Probably they'll go in.
  5. Hand drill and bits.  This might end up being my full roll of bits, but more likely I'll buy a small box of common bits, and call it good.
  6. Gimlets.  They weigh practically nothing, and they're the best tool I've ever found for starting screws.  Done.
  7. Planes.  I think I'll have a #5, #3, and the wooden shoulder plane in my regular kit.  That covers stock removal, jointing, smoothing, and rabbets, which is most of what I'll need.  I'll likely also toss a Veritas medium router plane in, because there are some things you just can't easily do otherwise.
  8. My shop apron.  The pockets of the shop apron hold:  a tape measure, a six inch combination square, a marking knife, a mechanical pencil, a folding 12 rule, and a very small six inch rule, which is great for checking mortise depths and things like that.
  9. Odds and ends.  The finest plate from my DMT set, a block of paraffin wax, a strop, scrapers, and stuff like that.  Probably a 16" rule, but maybe not.  Likely a bottle each of hide glue and Titebond 3.  At least one marking gauge.  Maybe a spokeshave, but maybe not.  Certainly a four-way rasp/file.
The real question in my mind is how much this is all going to weigh.  I'll probably drop it all in a bag or a bucket before starting to build, in case I wind up needing to slim it down further.  I could probably replace the #3 plane with a coffin plane, which would leave me the value but drop the weight some.


So what do I expect to be able to do with this?  Basically anything.  The ryoba and chisels mean I can cut dovetails.  Adding the carcase saw would mean I can suddenly cut dados, open or stopped, and grooves, and clean them with the router plane, which can also do things like hinge or lock mortises  The shoulder plane can cut rabbets.  Between the brace, hand drill, and gimlets, I can put a hole of any size in pretty much any wood.  With the coping saw, chisels, and a rasp I should be able to make curves of almost any radius, either inside or outside.

Some things will be difficult.  I wouldn't want to make a raised panel with this set, or cut grooves in anything very large.  I'm considering ordering the Mujingfang plow plane:  If it's decent, I might keep it for this chest, as a light-weight option.  If I could manage to replace all of the planes with wood, that would lighten it up considerably, leaving the brace as the single heaviest item.

In any case, it should prove interesting!

Sunday, April 12, 2015

CTR 10: Garrett Wade Gimlets

No, not the drink.  The old-fashioned hole-maker and screw-starter.


Where, and How Much?

These were a gift, but they came from Garrett-Wade, and are $25 for a set of seven.  You can get them here.


(photo from Garrett-Wade)

What do you get, and What's the Construction Like?

They come as a set of seven, from 5/64" to 3/16".  Construction is traditional, robust, and very simple:  it's simply a piece of wire, with threads and fluting cut at one end, and the other end bent into a handle shape.  They've been made this way more or less forever, and it's utterly reliable.

 How do they work?

These work beautifully.  I'll be honest, I didn't really have high hopes for them.  I've used gimlets a few places before, and didn't much like them.  They didn't cut well, they bound in the wood, and they didn't seem to make starting a screw any easier.  I decided I wanted these because Garrett Wade has a good reputation, and I was sick of trying to drill pilot holes with an eggbeater drill.  I made a very good choice, because they're fantastic.

Here's how they work.  Once you know where a screw is going in -- say, to install a hinge -- you mark where you want the hole.  You could use an awl, a marking knife, or the gimlet itself.  Pick a gimlet that is the same diameter as the core of the screw, or just a touch larger.  Twist it into the wood.  It shouldn't take much strength or effort, because the threads at the point will draw it in.  When you're done, twist it back out in reverse.  That last bit is important:  you'll end up with the ghost of a thread track in the wood, which means the screw will go in with practically no effort at all.  At this point there's no tool I'd rather use for drilling pilot holes.  This is another technology where I don't understand how it got lost:  sure, if I have a thousand holes to drill I'd rather use a power drill, but how often does that happen?  In my shop, probably never.

Final Thoughts?

They're well worth the cost, and if you ever need to drive small screws, order a set.  They are a little harder to use in hardwood, but they still do a pretty good job.  I've recently run into a number of tools like this:  things that seem like they should never have fallen out of style.  The mid-size Yankee screwdriver is another.  It produces more torque than my electric drill, while weighing less and being easier on my wrist.  More on that in another entry, though.  For right now, the important information is that it's well worth buying a set of these, and they'll make your life easier.

Would I buy another?

Absolutely.  They're cost effective and efficient.

Sunday, April 5, 2015

Dutch tool chest, details

Yesterday I promised some details and photos of the chest.  Let's start with the outside.

The paint was dry enough this morning for me to re-assemble and repack the chest.

It's now very blue...


You can also see how cramped my workspace is... I'm squeezed in next to the clothes dryer.


Top open.  You can see the rack for small joinery saws at the top, the tool rack, and the top of a couple of large saws.    Below is a closeup of the joinery saws:  I'm working on rehabbing a nice old dovetail saw, but I haven't finished re-cutting the teeth yet, so this little gent's saw does the job for now.


The inside of the top section.  The rack holds screwdrivers, chisels, odd bits for a brace, and a Yankee screwdriver.  Bench planes and large saws are also stored up here, along with a box holding a full set of auger bits.  I somehow forgot to put the tenon saw back in before shooting.  Oops.  The tool rack and saw till I'll probably replace at some point... they work OK for now, but they're not ideal.


Fully open, with the bottom pretty empty.  There are two more shelves that go on the right, which you'll see next.


Almost entirely packed.  A few more things got added to the top along the way, but this is pretty much what it looks like in daily use.  I'm considering a shallow drawer (maybe two inches deep) for the top of the open section.  The shelves are really over-filled, and it would be nice to have a safer place for things like scrapers and blades for the combination plane.


Finally, the front panel.  The 16" square and coping saw fit pretty perfectly, and the slats to hold the panel in place slide behind the square just about perfectly.


All in all, I'm happy with the way this came out.  Even freshly painted it looks a little battered, but I don't mind that:  it was made from recycled lumber (previously a nearly unusable workbench), and I enjoy that it shows some history.

I doubt I've finished my changes to it:  I'm pretty sure I'm going to build a drawer for the lower section, and I may well rebuild the tool rack and saw till as well... I'll have to use them a little longer, and see what other tools I acquire.  At this point I think I mostly just need things like moulding planes, so there shouldn't be much change necessary in the top section.

In any case, there it is:  my completed-for-the-moment tool chest.


Saturday, April 4, 2015

Thoughts on the Dutch-style Toolchest

I've been using my Dutch-style toolchest for over a year now, since early October 2013.  In that times, I've learned some things about it, some good, some bad.

The Bad

On the bad side, in one respect the design is a complete failure.  Part of the idea was that I should be able to pick it up and move it, fully loaded, on my own.  That's just not going to happen.  It weighs far more than I can comfortably carry, and I suspect the handles would tear out of the sides if I tried.  If I replaced all my metal planes with wood it might be different, but I don't think that would be enough of a change to solve the problem.

In addition to that, I'm running out of space, and some of my tools (the combination plane being the primary offender) just don't fit conveniently.  The combination plane is too long, tote to toe, to just slide in, so I have to put it in sideways, at which point the adjusting rods inevitably trap something else behind them.  I've also accumulated more tools than I really expected to want to store in it, and I'm going to have to make some hard decisions sooner or later, or else build an auxiliary toolchest and try to split things up into "used frequently" and "used rarely" categories.

The Good

There's far more good to say about it, though.  The primary goals of a toolchest, in my mind, are to keep tools safe, and to keep tools easily accessible.  This chest accomplishes that, and in far less space than I would have expected.  Things do get tangled up in that combo plane, but other than that everything is easy to reach.  I can grab a chisel, screwdriver, saw, or a plane (mostly) without having to move anything else.  The top compartment holds a full set of bench chisels, a 1/4" mortise chisel, screwdrivers (including a small Yankee drill/driver), bit adapters and a countersink for a brace, rip, crosscut, carcase, tenon, and dovetail saws, along with #3, #4, and #5 planes, a block plane, and an old transitional jointer plane.  I've also got my box of auger bits in there for the moment, for lack of a better place to put it.  Everything in there can be grabbed without having to shift anything else, and those are the tools I use most often.

The lower case holds moulding planes (what few I have), a hammer, the brace, an eggbeater drill, squares, a coping saw, scrapers, and various other bits and pieces that don't make sense to store up top.  They're more or less just tossed into the chest, though, so finding things can be a bit of a challenge.  Still, it rarely takes more than 30 seconds to find something, and at worst another 45 seconds to extract it.

The biggest advantage is in the convenience of cleanup.  Every tool has either a defined place or goes in a pile in the bottom.  That means putting everything away takes a few minutes, and there's no real thought involved beyond "does this need to be cleaned?".  As a result, my tools spend more time put away, and less time sitting out on the bench.

What's changed?


It looks like the last thing I published about this chest was in 2013 (here), and some things have changed since then.  I plan to do a more thorough breakdown, but here's the short list:

  • I did, in fact, add a shelf stack to the right end of the lower compartment.  It holds a Stanley #78 rabbet plane, my squares and gauges, blades for the combination plane, and scrapers.  Getting the small stuff out of the way has helped organization a lot, and makes it less likely that something will fall out of the chest when I open it.
  • The lid was completely replaced with a frame and panel arrangement.  The lid now has safe storage for a cacase saw and a dovetail saw, which has been really nice.  It's now one step to get to either one, or to put it away.  I used the lid for about 6 months without any glue (the frame is a pegged mortise and tenon arrangement) and it worked great:  this morning I knocked it apart, added glue, and put it back together... I'll paint it tonight, and reassemble it for the final time and photos tomorrow morning.
  • I've moved the tool rack to the back wall, gotten rid of the divider in the top, and added a saw till.  I just couldn't find a better way to store long saws, and it seems to be working quite well.
  • I painted it bright blue.  I like blue, and I found some cheap paint in a remarkably bright shade.  Yes, there will be pictures.  I ended up not priming it first, and I really like the sort of battered appearance the re-used wood has, and the slight variations in color from old stains on the wood.  It doesn't look like a show-piece, it looks like a chest that has had a long and productive life.
  • I build cleats to hold a 16" combination square and a coping saw into the removable front panel.  It means I need to keep that panel accessible when I take it off, but it works beautifully.
  • I gave up and bought something for the chest:  handles for the sides.  They're cheap steel chest lifts, but they fit and they make it simple to just grab the chest and move it (at least when it's empty...).
Once everything is back in it, I'll get some pictures to show the current layout.


Overall, I'm thrilled with the chest.  I admit I still love the idea of doing a big traditional tool-chest, but there's just no space.  My "shop" space is still only 6'x6', and a 2x2x3'+ chest just wasn't going to happen.  Someday I'll get my garage insulated and heated, and maybe I'll build one there.  Or maybe I'll just stick with the chest I have and am used to.

Saturday, November 22, 2014

My next bench will have an apron

I haven't written anything here in quite a while, but I haven't been completely out of the workshop.  I built a frame, which I'll write about sometime soon, practiced M&T joints (which make me want a G&T, but that's another issue...), and built some frame-and-panel cabinet doors for a friend.

That last one prompted this post.

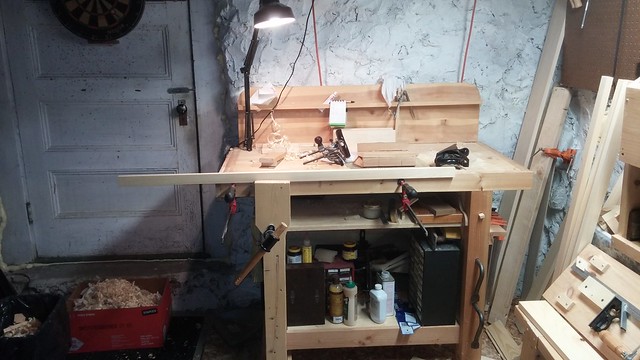
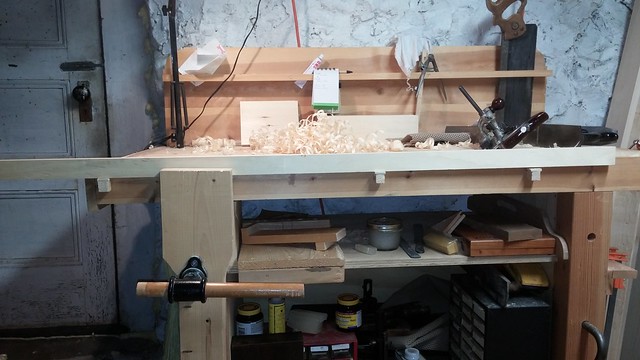
Some of you will have read the post about my bench, and how I built it.  Well, when I built it, I really didn't have a good bench, so I didn't have a lot of experience with the process of actually, you know, using a tool bench, especially for hand-tool intensive work.  Over the past few years I've built some little boxes, a tool chest, a picture frame, and a few other small things.  Well, these cabinet doors are 52" long, which means they're 4" longer than the bench.  That's mostly fine.  Trimming them to length was fine, shooting them was easy, smoothing wasn't an issue.  And then I needed to groove them to take the panel.  I ran into two problems.

First, they're too long to work on on the benchtop.  Normally, I'd use a holdfast to clamp down a batten, bring up the planing stop at the end, and work away.  These are made of 1x2 dimensional lumber, so balancing them isn't an issue, and I've done it before.  But these are longer than the bench, and I just don't have the room to work on a piece that long.  That's fine, that's why I have a vise.

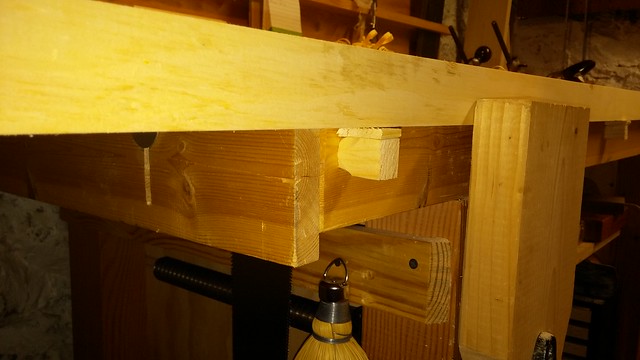
The second problem is that they're only 1 3/4" high.  I can clamp them in the vise, but they're long enough to flex when I start trying to use a combination plane on them.  So I spent 15 minutes drilling holes in the front edge of my bench.  It's about 3" thick, so there's plenty of space, but after the first inch and a half it's drilling into the edge of plywood.  I wound up being able to do the work, but it was a challenge.

This was my test set up, confirming that support from the bottom would be sufficient:


20141107_203451


I basically just put two long clamps from the front to the back, and propped the wood on those.  It worked, but the edges of the clamps are thin, and it looked like it would damage the wood.  I could have just clamped blocks to the front of the bench, I suppose, but that's a one-time solution that will take time to repeat.  Nonsense.  Here's what I wound up with.

20141109_124436

20141109_124448


Sorry about the color balance on that last one:  all the photos were taken with my phone, but that one caught the light weirdly.

Anyway, you can see what I did:  drilled some holes, then more-or-less rounded the ends of some blocks, and padded them with 1/8" scrap to move the board up some.

In the end, it worked, but it would have been a lot easier if I had an apron with holes pre-drilled in it, so I could just clamp a support board on.  So that goes on the list for the next bench.

Friday, July 25, 2014

Thoughts on planes

I found myself writing a comment the other day on what planes are best to start with if you mostly use power tools.  The usual recommendations are OK, but frequently include things like a jack plane.  But if you're mostly a power tool user, a jack plane isn't all that useful.  You can use it to thickness boards if they're too wide for your planer, or flatten boards if they're too wide for your jointer, but that's hard work, and not a great place to start.

So what is a good place to start?  Well, there are some tasks that either aren't easy or require a lot of setup with power tools.  I think those are good places to start:  find hand tools that do things that are hard or time consuming with power tools, and easy or fast with hand tools.  So here's my list, in no particular order.


  • A shoulder plane.  This one makes a lot of the lists, for good reason.  Get a wide one; 1", 1 1/2", something like that.  This can tweak tenon shoulders or faces, take a tiny bit off a rabbet that's not quite deep enough, things like that.  With sufficient practice, it can cut a rabbet in the first place, either following a pre-cut shoulder (probably cut with a table saw), a fence, or a knifed line.  If you cut a lot of tenons or rabbets, this is a good plane to have.
  • A rabbet plane.  Something like the Stanley #78 is a wonderful first plane.  With a fence to control the width, a stop to control the depth, and a nicker to allow it to work cross-grain, this is a fantastic tool for cutting one or two rabbets.  If you have gauging blocks, set up is easy:  just set it blade down on the bench with a block under the depth stop to set depth, and on its side with a block under the fence to set width.  Now cut the rabbet.  Setup should take under a minute.  If you have dozens of rabbets to cut, use a table saw with a dado stack or a router table or something like that.  But for a few rabbets, this plane will cut them fast enough that you'll still finish quicker than you would setting up the power tools.  If you make a lot of small projects with one or two rabbets, this is a good plane to have.  If you only do large runs and need dozens of identical rabbets, pass it by.
  • A block plane.  Personally, I don't much like these, probably because I don't have a good one.  But they're nice for chamfering edges, tweaking joints that aren't quite level, and things like that.  They're small enough to put in a pocket, so there's no reason to ever not have one in easy reach.  If I were buying one new, I'd buy either a low angle model or one with an iron that goes all the way to the outside edges so I could use it instead of a shoulder plane for cleaning up tenons.
  • A grooving plane.  This could be a combination plane. It could be a plow plane.  It could even be an old wooden plane with a fixed fence that cuts a single width of groove at a fixed distance from the edge of a board.  Whatever, it's a useful tool.  Use it for grooving the rails and stiles of a door.  Use it to cut the groove to hold the bottom of a drawer.  Working in small stock, it's easier and safer than a table saw or router table, and for a single drawer or door setup is likely to be a lot faster.  Veritas makes a nice small plow, and I've seen good reviews of the Mujingfang plow plane, which is a steal if it's actually reasonable quality.  Again, if you make small projects with just a couple of grooves, or a lot of furniture with only one drawer, this is a great tool to have.  If you're trying to outfit a whole kitchen, you should probably take the time to set up a power tool to do the job.
  • Moulding planes.  Now that I have a beading plane, I think everyone should have one.  Mine is in terrible condition, but I can cut a bead in the edge of a panel in a few passes.  Once I've got it cleaned up, that won't change, but it will jam less frequently and may be able to handle cross-grain if I'm careful.  Bead the edges of your shiplap or tongue-and-groove cabinet backs.  Put a bead into the outer corners of table or desk legs.  It'll dress things up, and help protect the corners.  I paid ten bucks for mine at a flea market, and it will be perfectly useable once I've spent a little time tuning it up.  Doing beading with a router works, but I'm not actually convinced it works faster than a beading plane.  If you like beading the edges of things, or you just see one of these in good shape cheap, buy it.  If you pay ten bucks and use it half a dozen times, it was money well spent.

Once you have as many of those as you have a use for, think about a small smoothing plane.  I like my #3 and #4;  I use the #3 more often, partly because it's higher quality, and partly because I mostly work on small pieces these days, and they tend to vanish under the #4.  Use your smoother to take out the ripples left behind by a jointer or planer, and to make very fine adjustments in the width of a narrow board.  A jointing plane is better for that, but a smoother will work if you're careful.  

Only once you have all of those would I consider a jointer plane and jack.  If you're dimensioning with a table saw, jointer, and planer, you just shouldn't have much need for them.  They're fun to have, and occasionally useful, but the others will likely get used on almost every project.  A jointer and jack may get used a few times a year, if you're careful about what lumber you use.

Monday, June 23, 2014

CTR 9: Mujingfang hollow and round, 1/4"

UPDATE:  Now there are photos!

As you should guess from the title, this is a review of some of the inexpensive hollow and round planes you can find at Lee Valley and other places.  Overall, my experience has been fairly positive:  in line with others in the CTR (Cheap Tool Review) line, I'll be fairly forgiving of minor problems.

One note:  I'm using "hollow" to mean the body with a concave sole, and "round" to mean the one with a convex sole.  I'm pretty sure that's right, but if it's not, at least you've had warning.

Where, and How Much?

The pair I got were a gift, and I'm not sure where they were purchased.  Lee Valley carries them (here), at $20 each, or $37 for the pair.  Prices increase as size does:  a set of 12 (six different sizes) is about $250.  Japan Woodworker also has them, although as I write this it looks like they only have two sizes in stock.

What do you get, and What's the Construction Like?

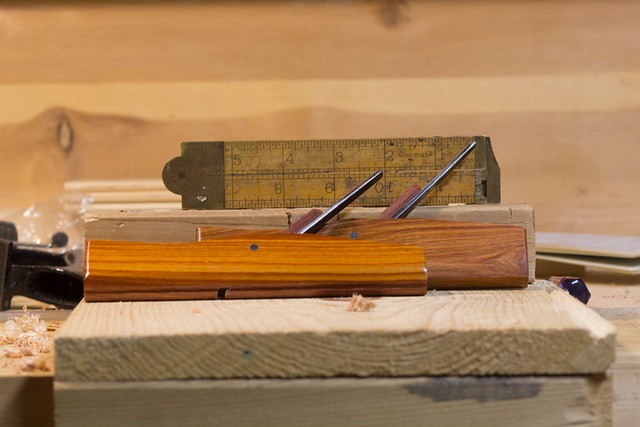
Each plane ships in a cardboard box containing the plane body, iron, and wedge.  In the case of my planes, the construction is reasonable.  The body is some kind of hard wood (the site claims a type of rosewood), and is well finished on the outside.  The inside of the mouth is rough, especially on the front:  the bedding surface is better, but still not polished smooth like the outside is.  That seems to be the philosophy behind these planes:  where your hand will touch it, or where it touches the work, make it perfect.  Everything else can go hang.

The wedge, in mine, fits well:  it slides into place easily, can be tapped tight fairly simply, and (mostly) directs shavings where they need to go.

The iron, similarly, is reasonably well shaped (better on the hollow than the round), but fairly rough everywhere except the final inch or so.  Since that's what's necessary for it to work, I don't really have a problem with that.

One final note:  these things are tiny.  Miniscule.  "Don't sneeze, they'll blow away with the shavings" small.  Lee Valley claims they're around six and a quarter inches long, which I might believe, but they seem smaller.


HR Planes with rule
Tiny, I tell you!

 How do they work?

I'm going to start with a disclaimer here:  these are the first hollow and round I've ever used.  In fact, rabbet and plow planes excluded, these are the first moulding planes I've ever used.  My review, therefore, is not informed from experience with dozens of planes.  It's based purely on the out of the box performance with no real expectations.

Next, a note on usage.  From what I've read, it's not really reasonable to just start cutting with a hollow or round.  A round should have enough of a rabbet cut that the iron makes contact at two places initially, and the hollow should be starting in such a way that two corners in the wood contact the iron away from the points.  Basically, use a rabbet or plow to take away as much material as possible, and only use the hollow or round to do the final shaping.

That said, how comfortable am I using them?  Fairly.  I tried a few tests.

Setup consisted of lapping the backs, then dropping them into the body and wedging them.  Adjustment was done with a panel-beating mallet, and if I'm going to keep using these I'll need a smaller hammer.

First, a piece of 1x4 pine.  Reasonably straight grained, very soft, and a cutoff I didn't need:  it's about 6" long.  For the round, I made the initial rabbet with my cheap "rosewood" rabbet plane (every time I resharpen it I like that plane more...).  Figuring out how to adjust it took some doing, since lateral adjustment matters more (and is more difficult) than with my other wooden planes, but once I was done it worked fairly well.  There's one quibble, but I'll discuss that in a moment.  For the hollow, I used the same rabbet to chamfer an edge, and worked from there.  Again, it worked pretty well.

So, what's the quibble?  The mouth kept clogging.  I don't know if I had the iron set wrong, if the wedge is shaped badly, or what, but the mouth doesn't clear as well as I'd like.  I feel like this is a flaw in the design:  a side-escapement plane should have less trouble, I think, because it's not trying to spit shavings up out of the top, past a pin. I'm really not sure, though.

Regardless, I ended up with a rather nice ogee profile in the edge of the board, about 1/2" wide.

The second test was in red oak, and that was a little rougher.  On the one hand, they did, technically speaking, work, and they mostly left a smooth surface behind.  On the other hand, there was some tear out, particularly at the ends of the boards, which was odd since I was running with the grain.  I think having the irons at a higher angle might help, but the end result was acceptable.  I suspect a lot of the problem was my lack of experience and odd grain in the oak, and better stock choice would help a lot.


HR Plane Test
Not bad, for a first attempt!

Final Thoughts?

For thirty six dollars, these are hard to beat.  Given that most companies selling hollow and round planes want $100+ for just one plane, it's probably impossible to beat.  Even building your own, if you buy tapered irons you're going to spend more than $18/plane:  a 1/4" iron from Lie Nielsen costs $15 before shipping right now, so unless you can buy your wood for less than $3 you're out of luck, costwise.

The quality is acceptable, if not fantastic, and I suspect that as I learn to use them they'll work better.

One final note is that there's an oddity to these planes, compared to Western ones.  On a Western style round plane, the body is straight vertically on one side (usually) and tapered vertically on the other side.  That means you can cut a fairly large part of the circumference of a circle with one.  These planes have a flat on each side of the convex part, which limits what you can do with them.  That's certainly not a dealbreaker, but it's something to consider.

Would I buy another?

This is an odd one.  The answer is no, but not because I don't think they're worth it.  As I said above, the price is unbeatable.  The reason is that I acquired some nice maple, and Lie Nielsen started selling tapered moulding plane blanks, and I think it would be interesting to make my own.  That way I can get a much larger range of sizes, and I can get the Western profile, which I prefer.  But if you want a small set of hollows and rounds, and you don't have the money to buy new Western style or the patience to find and rehab old ones, these are a good choice.